How To Clean Your Front Load Washing Machine
Hello and welcome to the blog! Thanks for stopping by! Today I am tackling a very hot topic..how to clean your front load washing machines!! I have been sharing this process on my Instagram stories and I can’t believe how many Dm’s I got about it! These front load washers, although pretty to look at, seem to have an universal issue. They start to smell and get mold and all kinds of nasty build up! So today I am going to walk you through the steps I took to get my front load washer nice and clean, and most importantly not smelly!
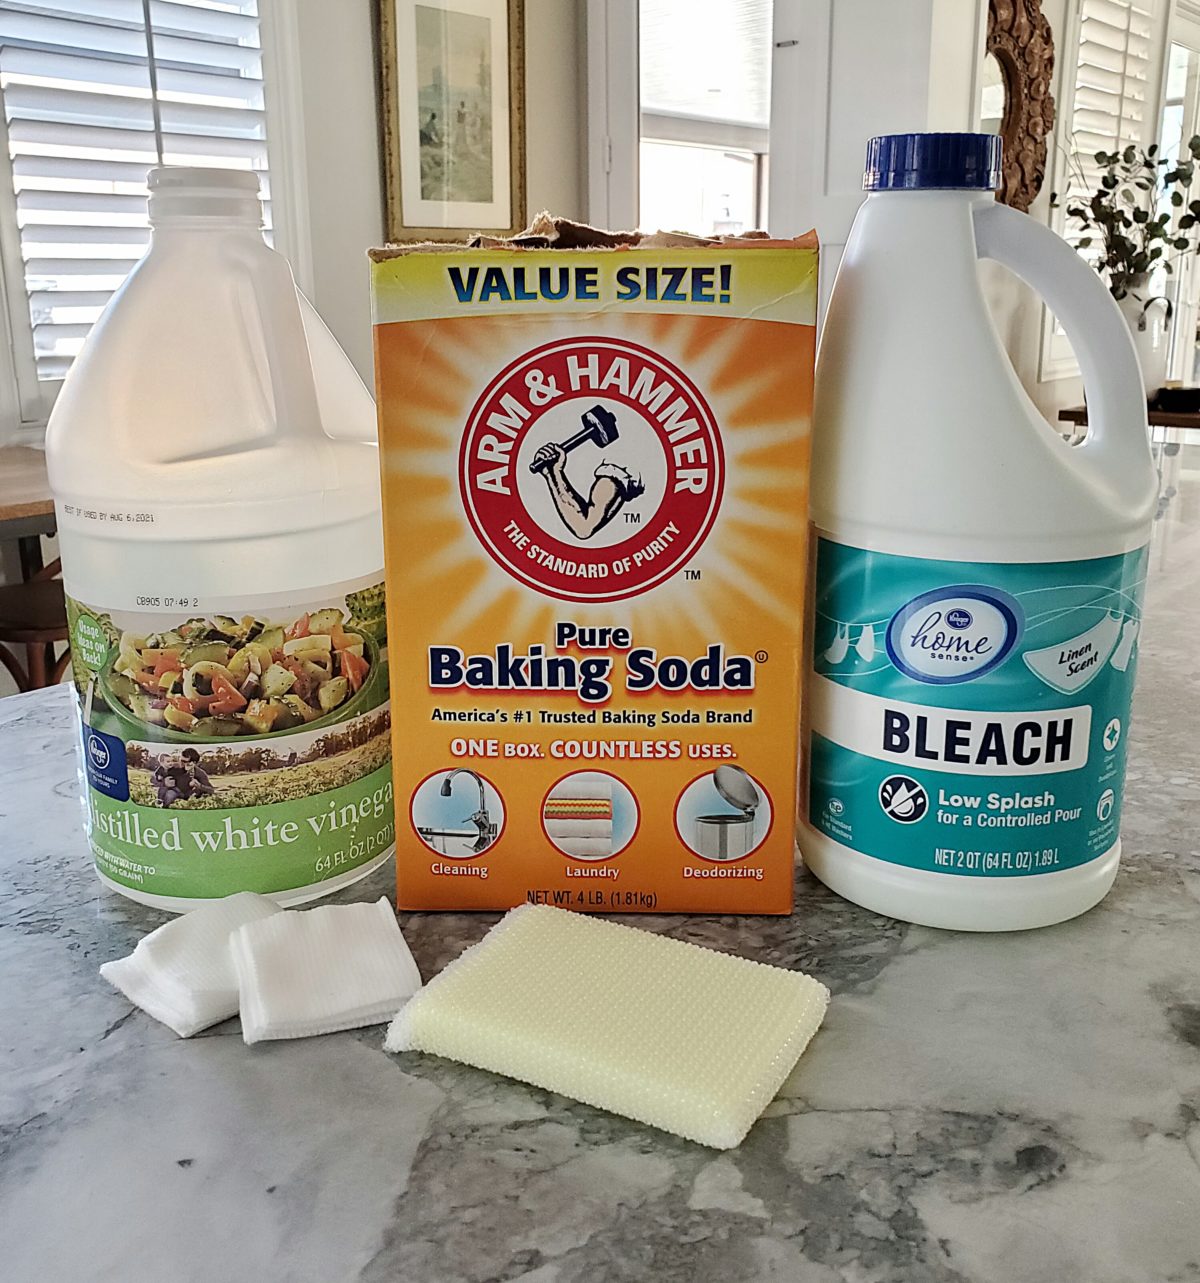
Alright here is what you will need in your arsenal to clean your front load washer. Vinegar, Baking Soda, Bleach, A sponge, toothbrush, sorry forgot to include it in the photo, and gauze or cotton makeup squares.
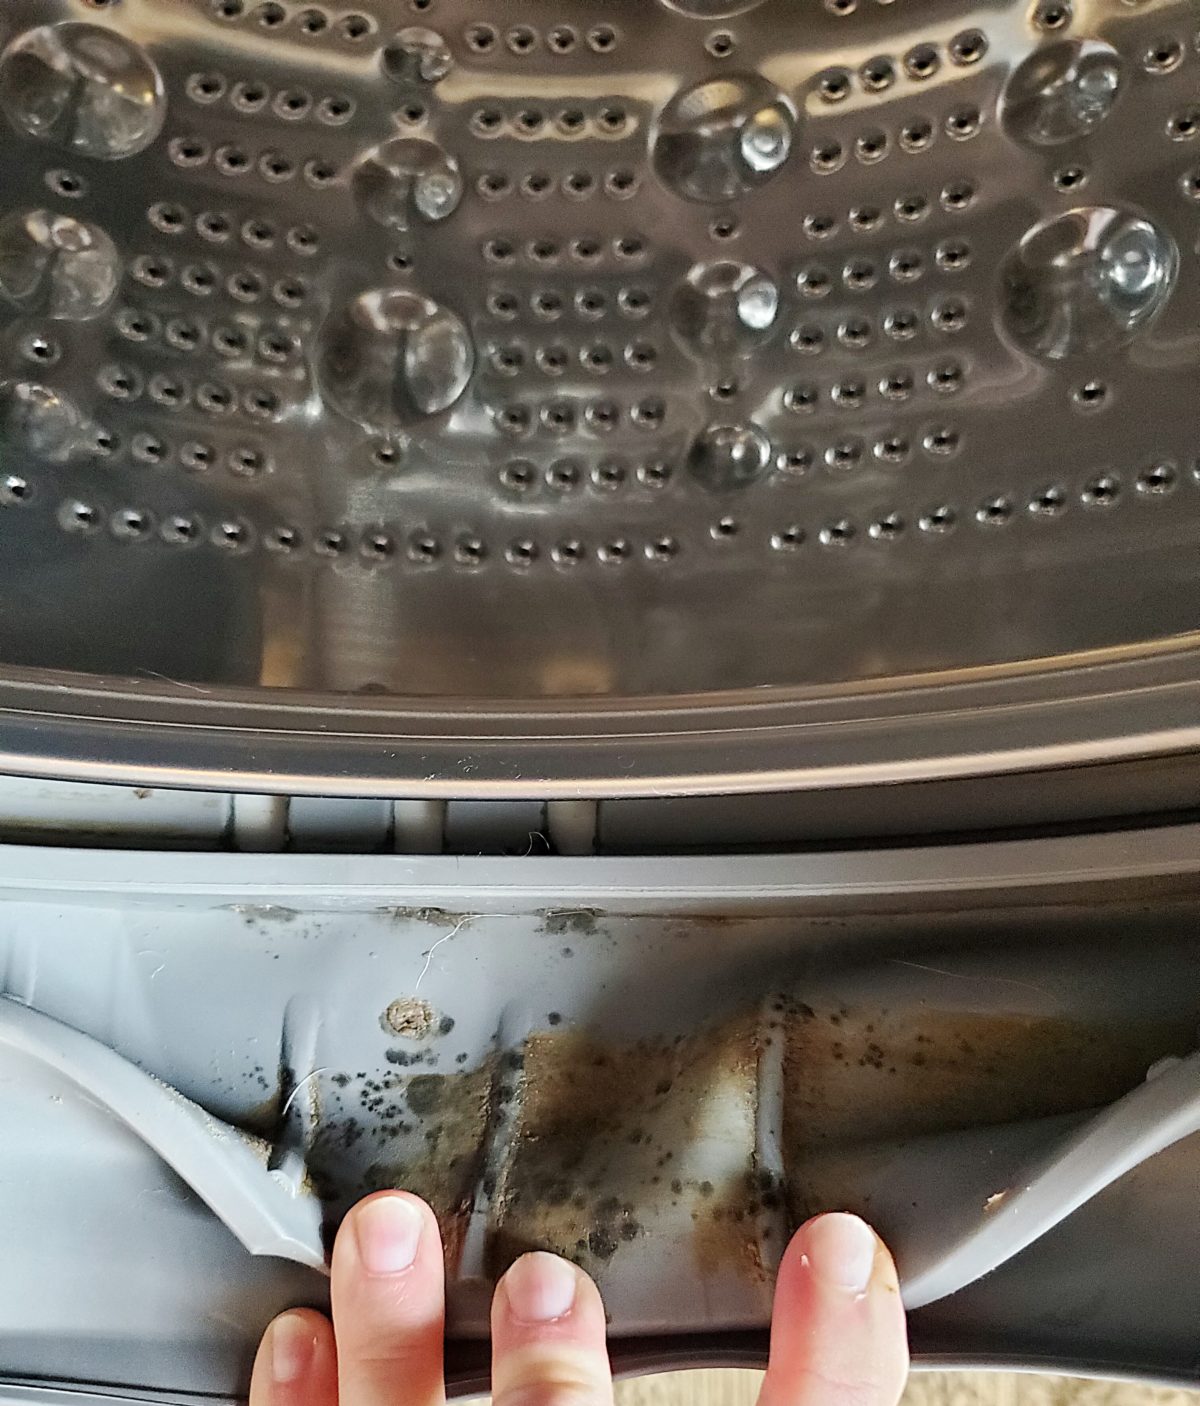
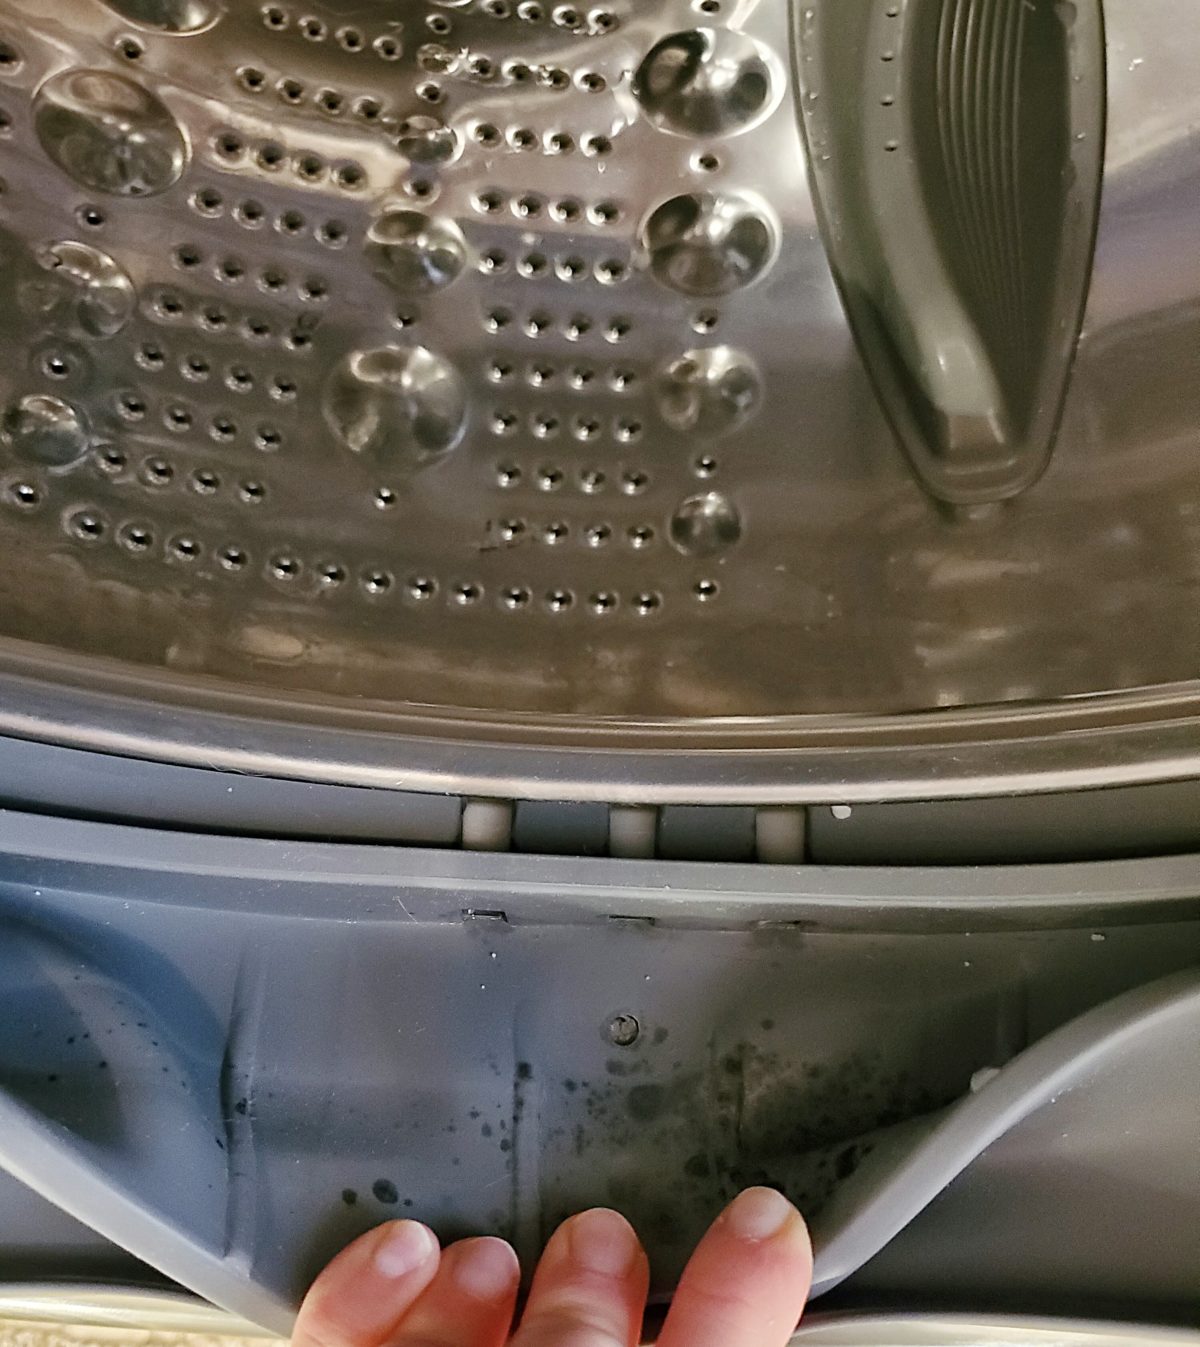
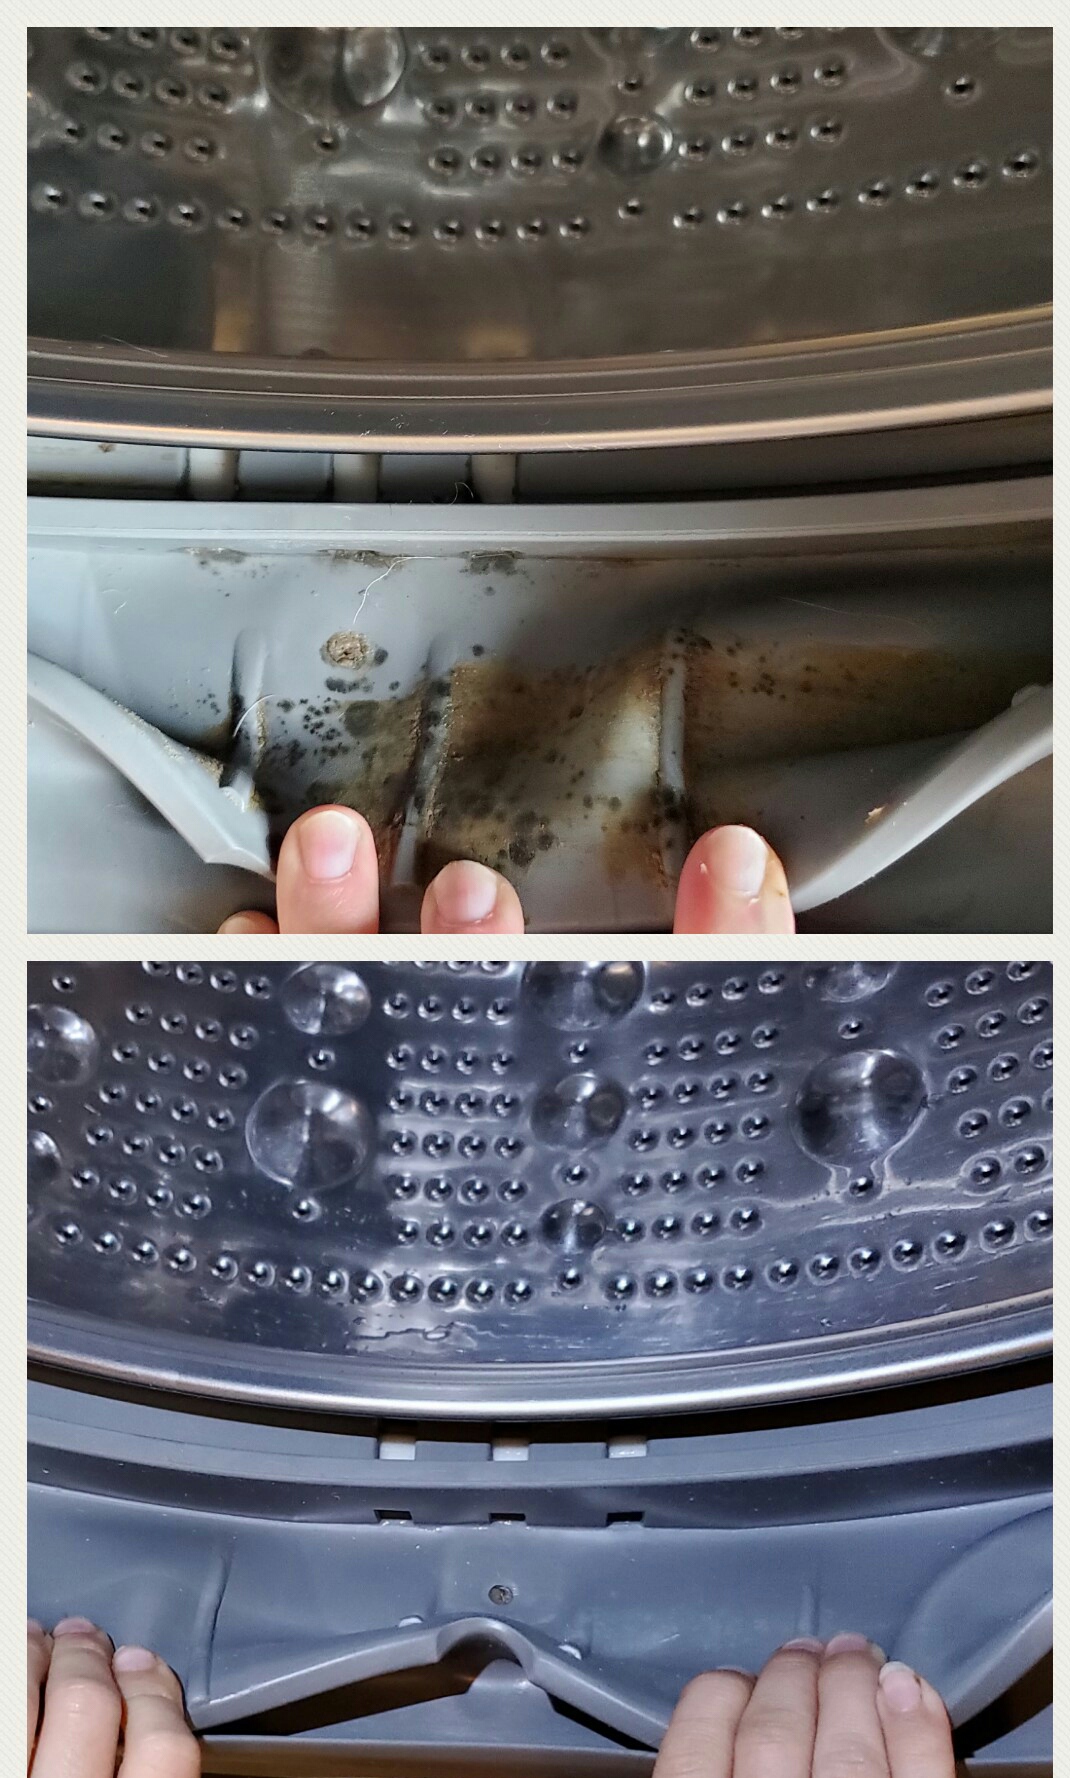
Alright first we need to take a look at how nasty my washer was prior to cleaning it so you can appreciate what it looks like now! This is the rubber ring that is around the door. This black mold and Lord knows what else was all in the bottom of it! It honesty looked like a petri dish from my Microbiology days! No wonder it smelled so bad!
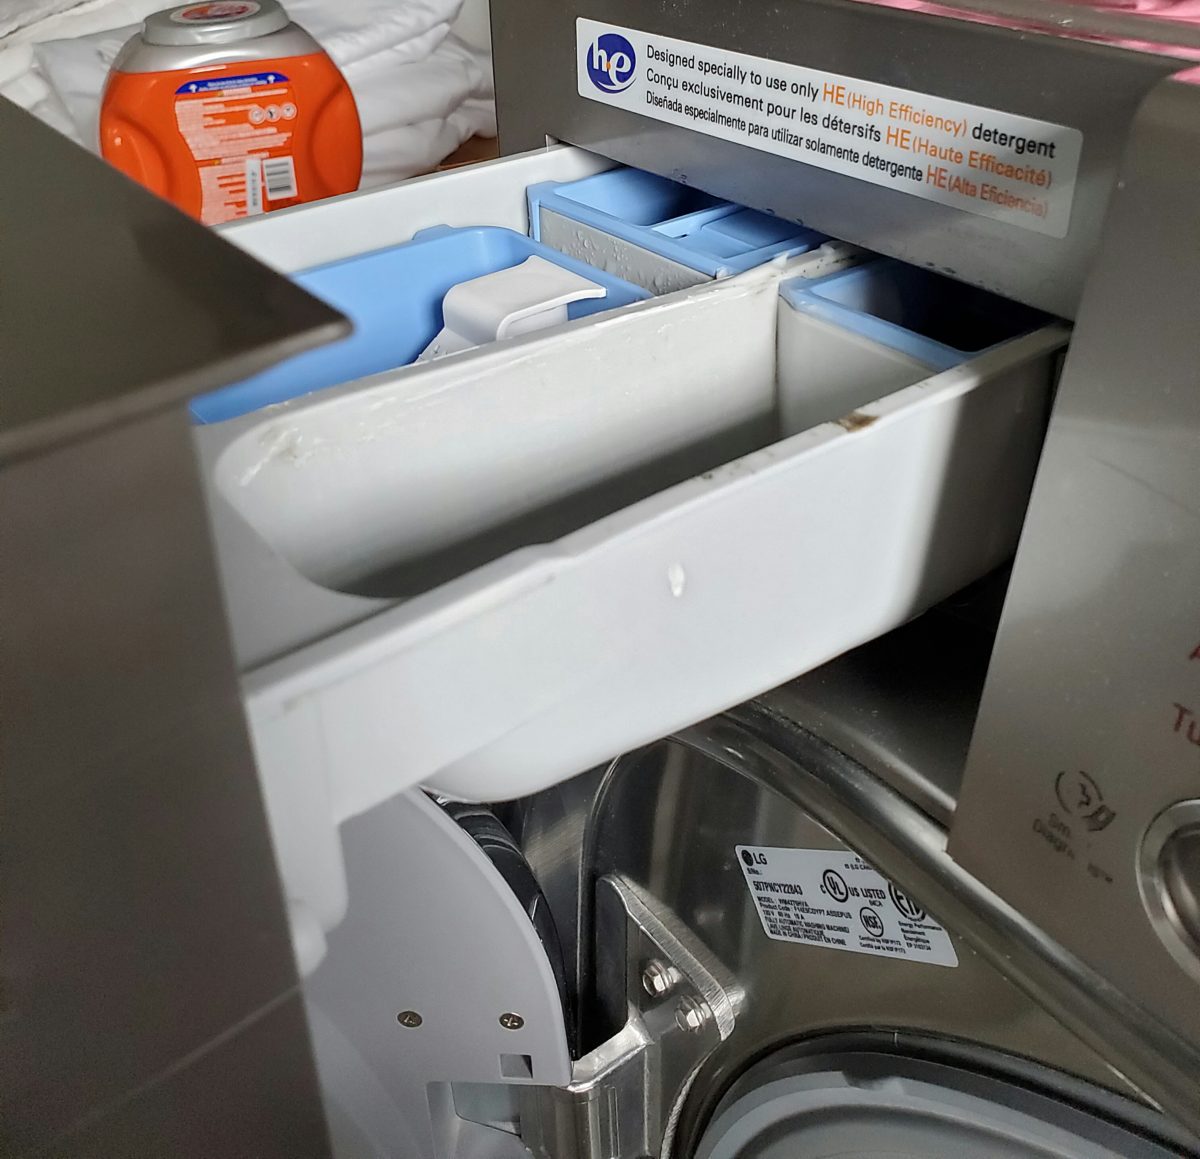
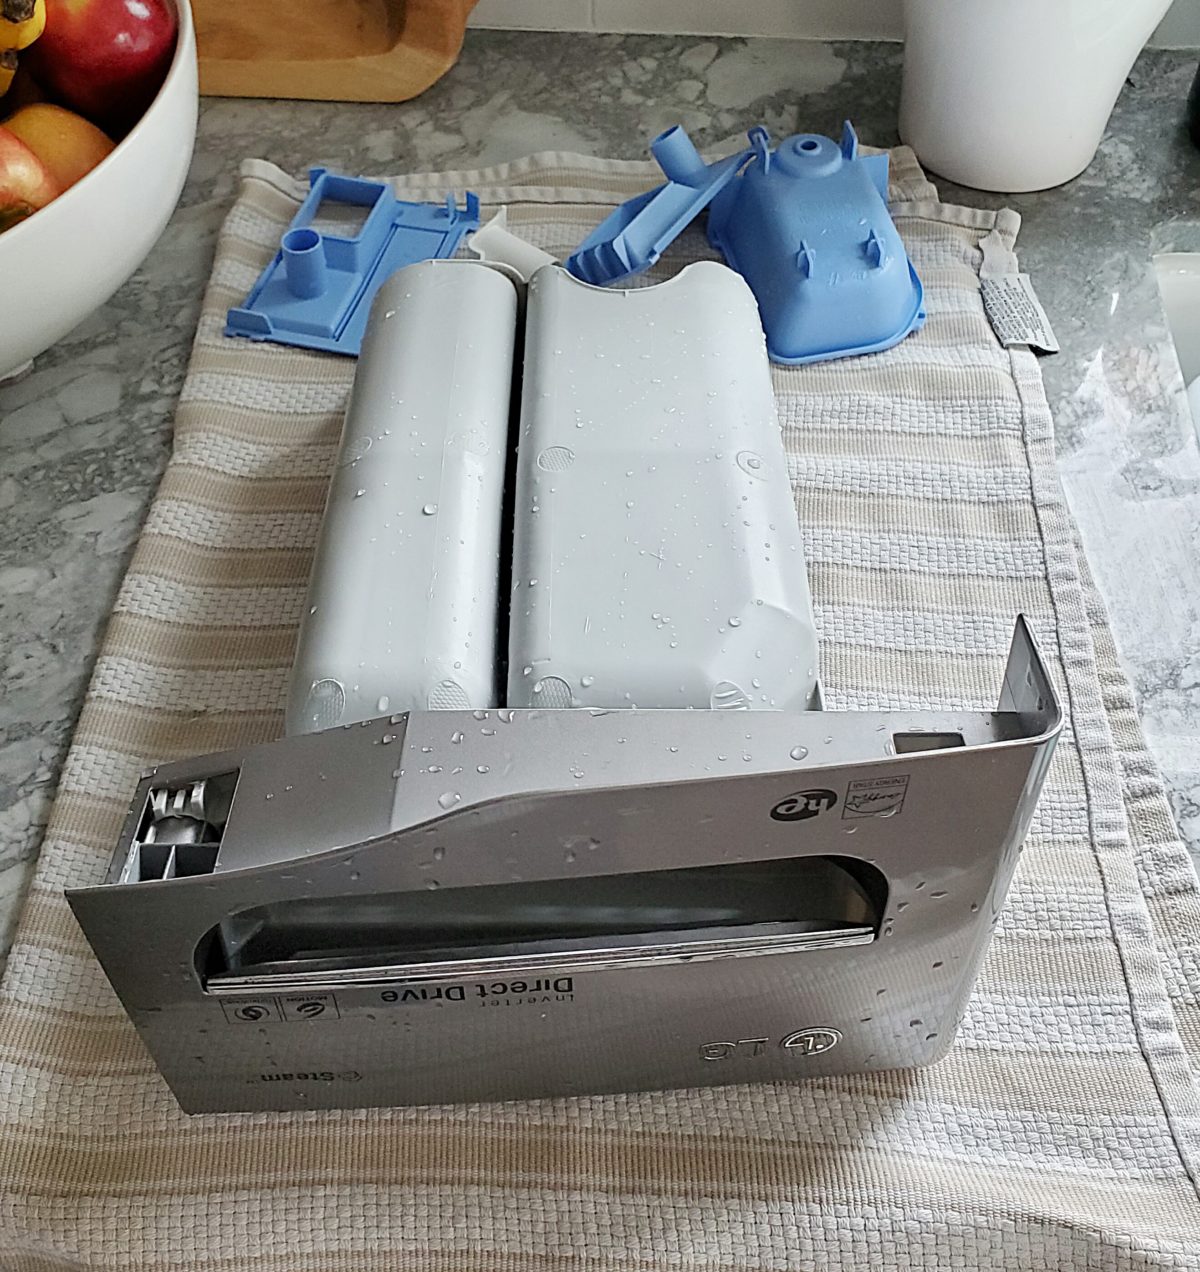
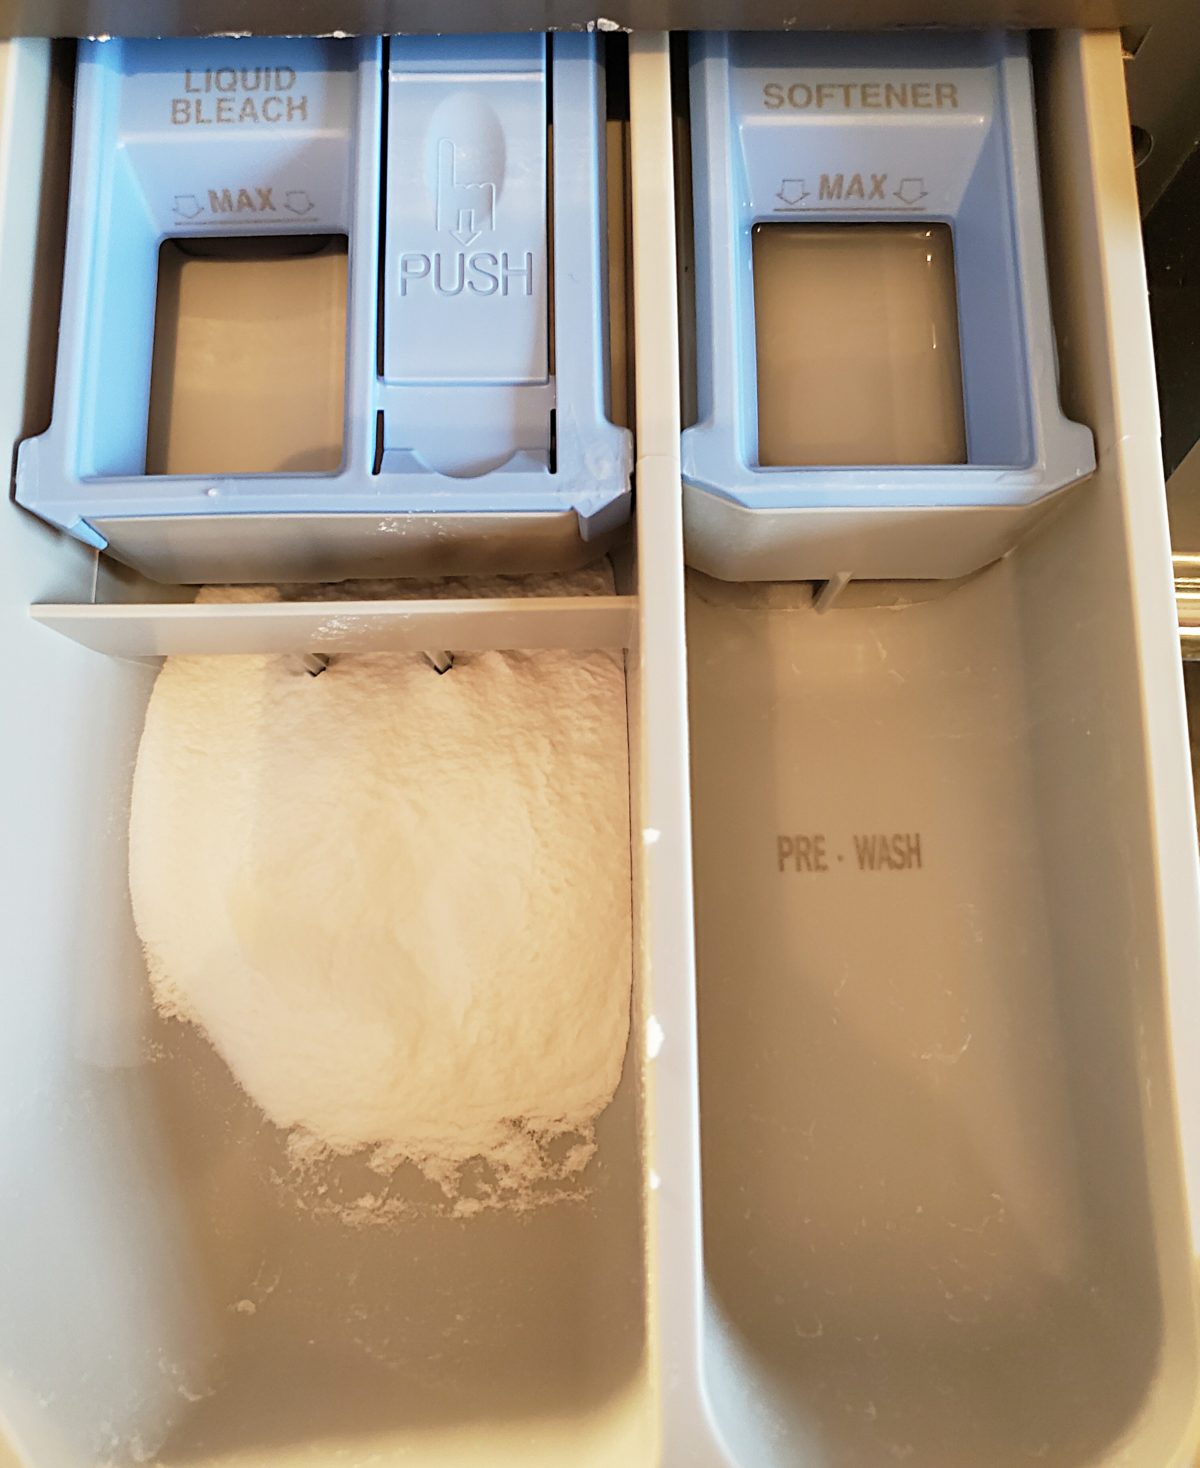
My tray where the detergent goes wasn’t much better. It had mold and laundry detergent build up all over.
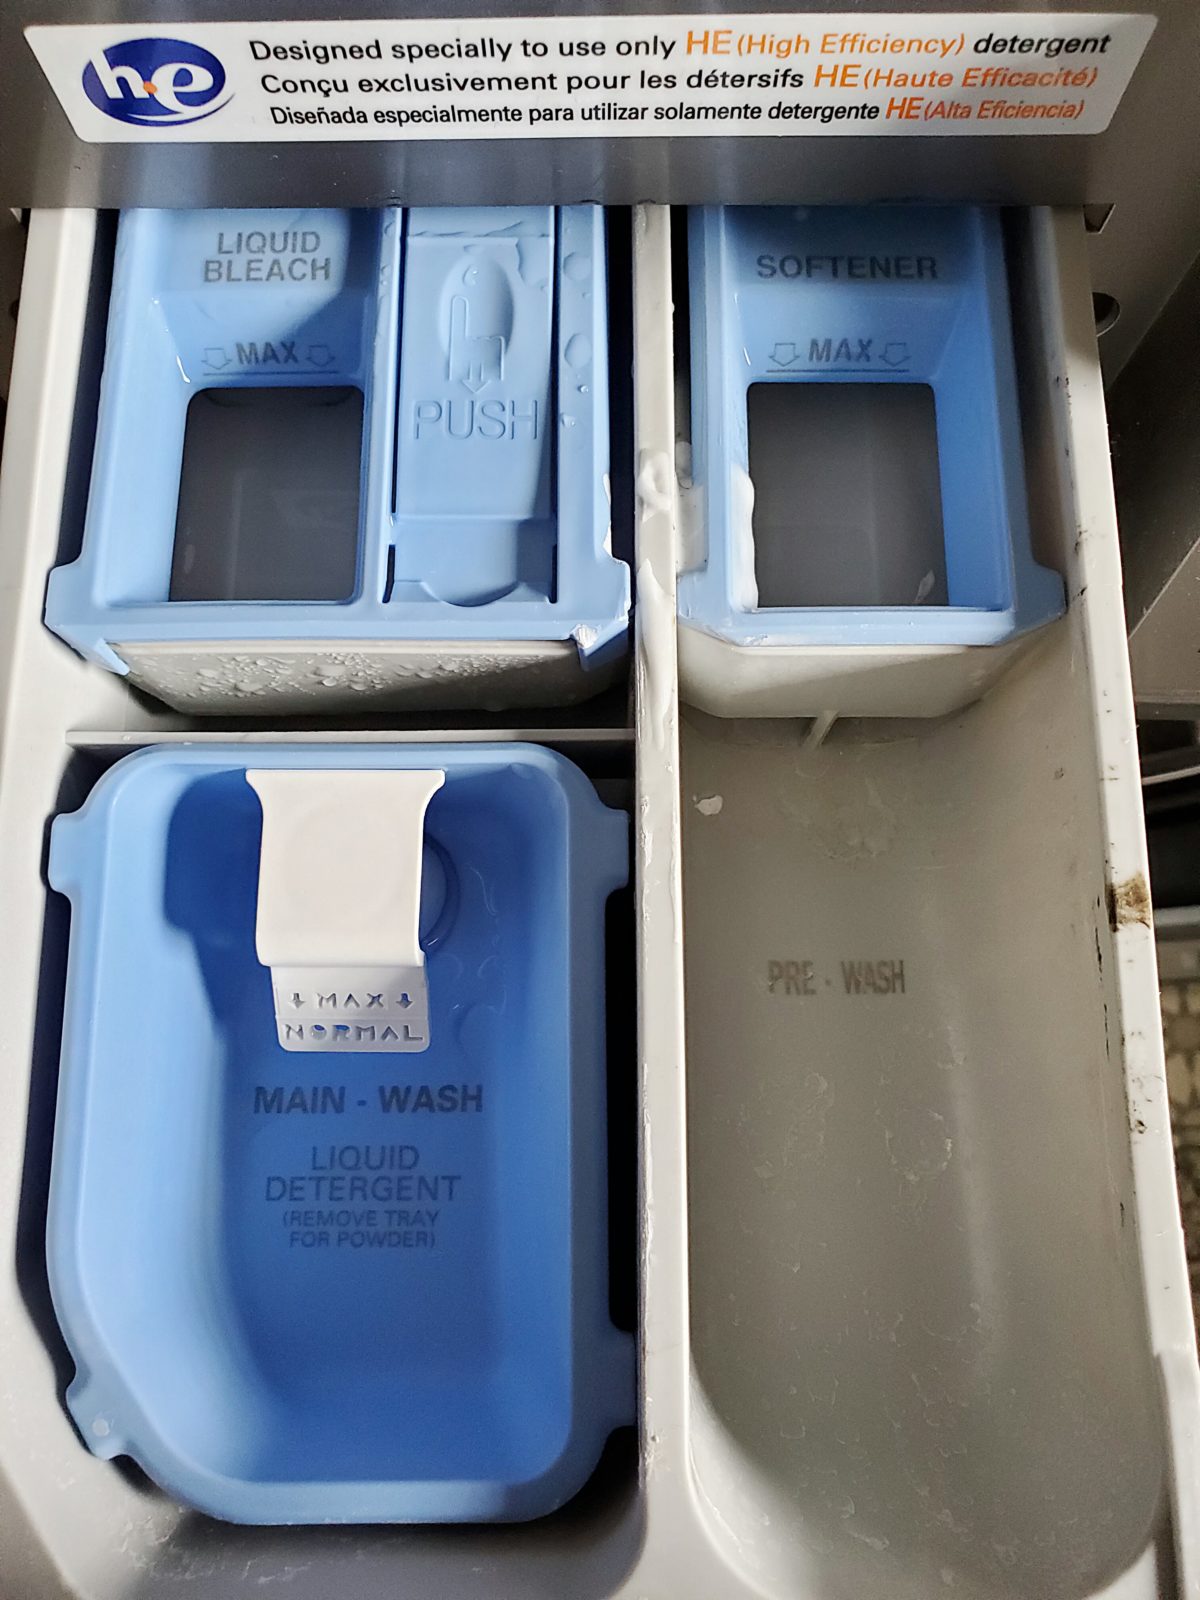
When I removed the tray it was just as nasty! On top there was mold and so much laundry detergent build up! It’s crazy to think this is how I was cleaning my clothes!
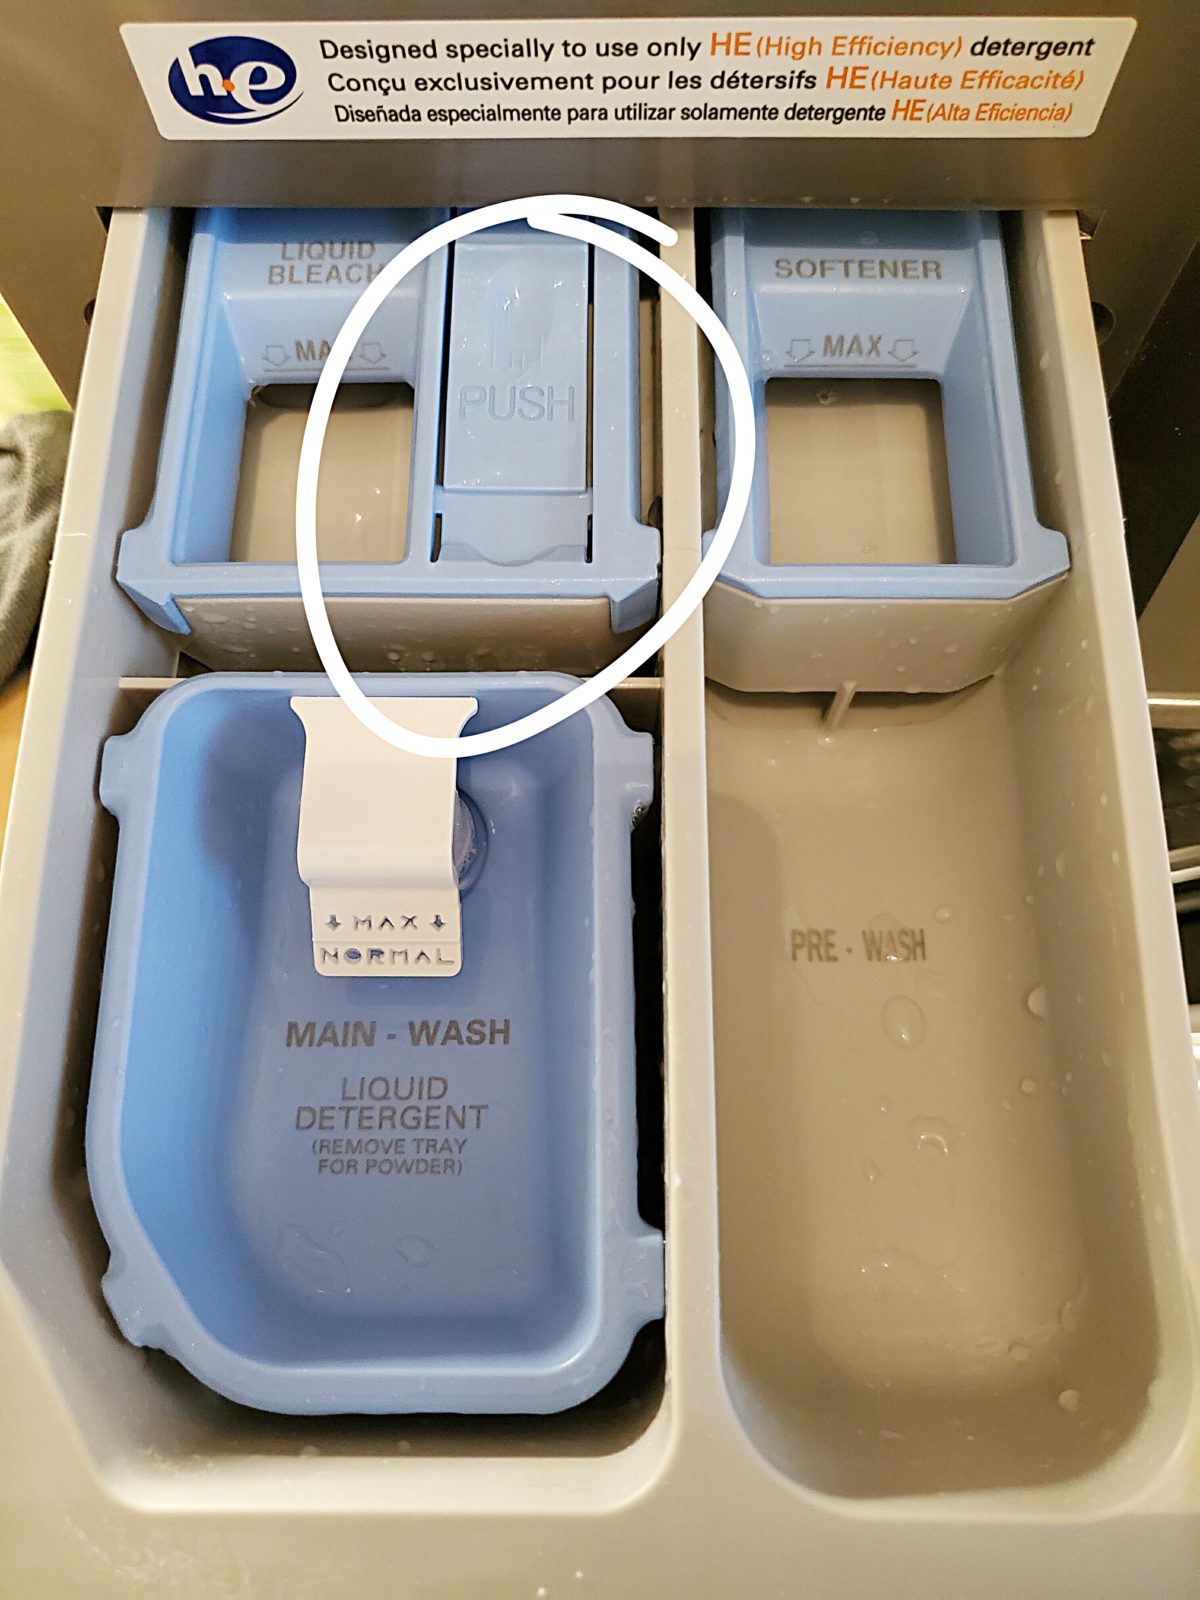
I have the LG 4.5 cu. ft. High-Efficiency Front Load Washer with Steam, and you can remove the detergent tray by pushing the the button that says push and then pull it out at the same time. All brands are different, but this is how you remove mine.
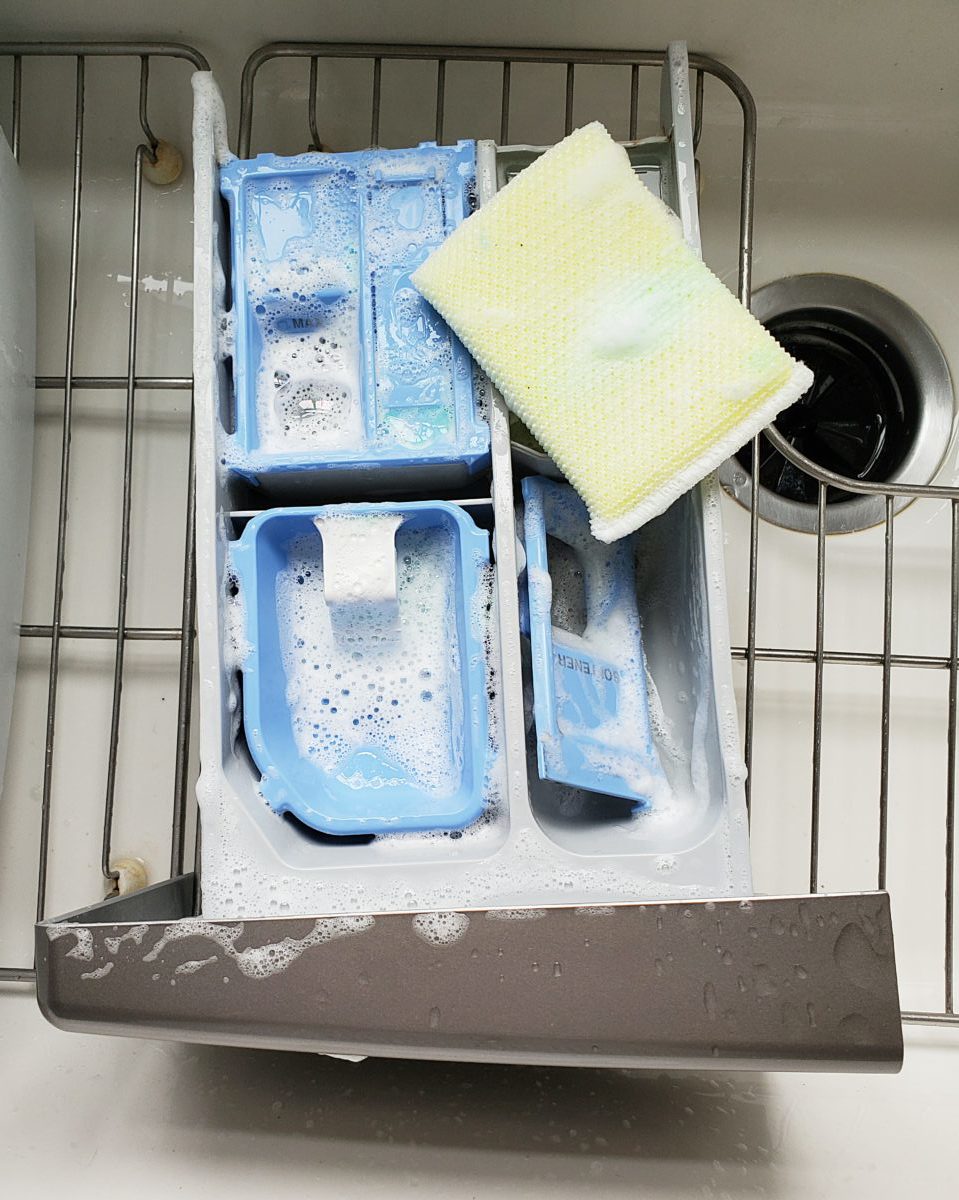
Once I removed the tray I cleaned it with soap and water and gave it a good scrubbing!
I then left it to air dry while I continued to clean the washing machine.
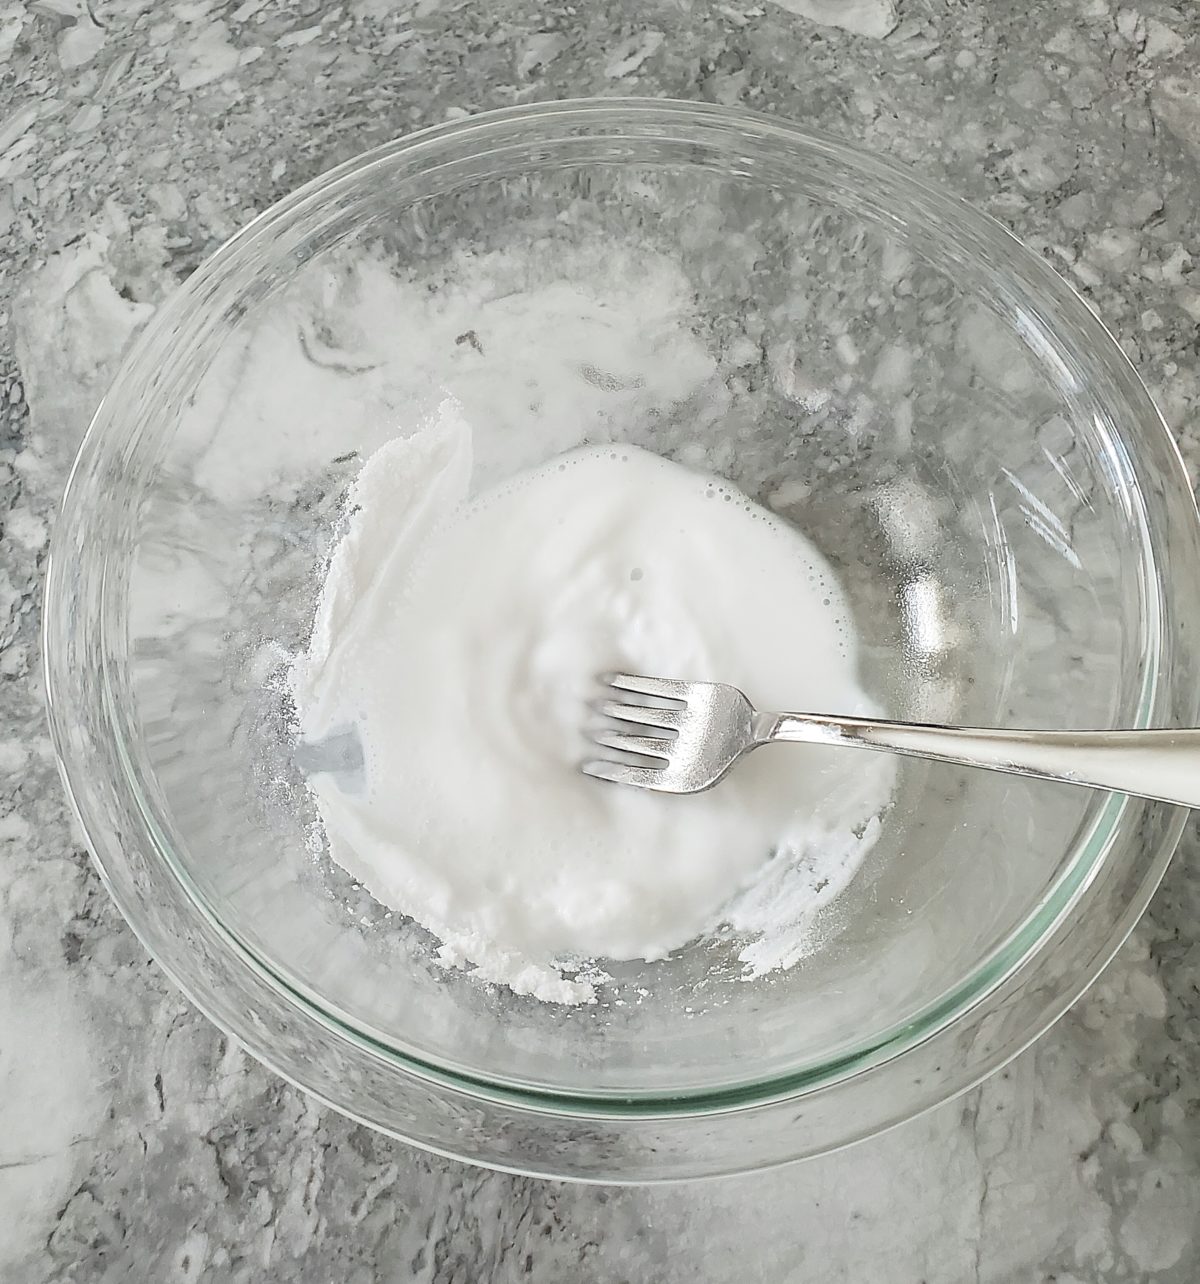
Ok here comes the fun part…cleaning the washing machine! I mixed about 1/2 cup baking soda and 1/4-1/2 cup vinegar together. I love watching it fizz up when you add the vinegar! You want the mixture to be a paste. Similar to the consistency of tooth paste, so you can play with the amounts until you get the right consistency.
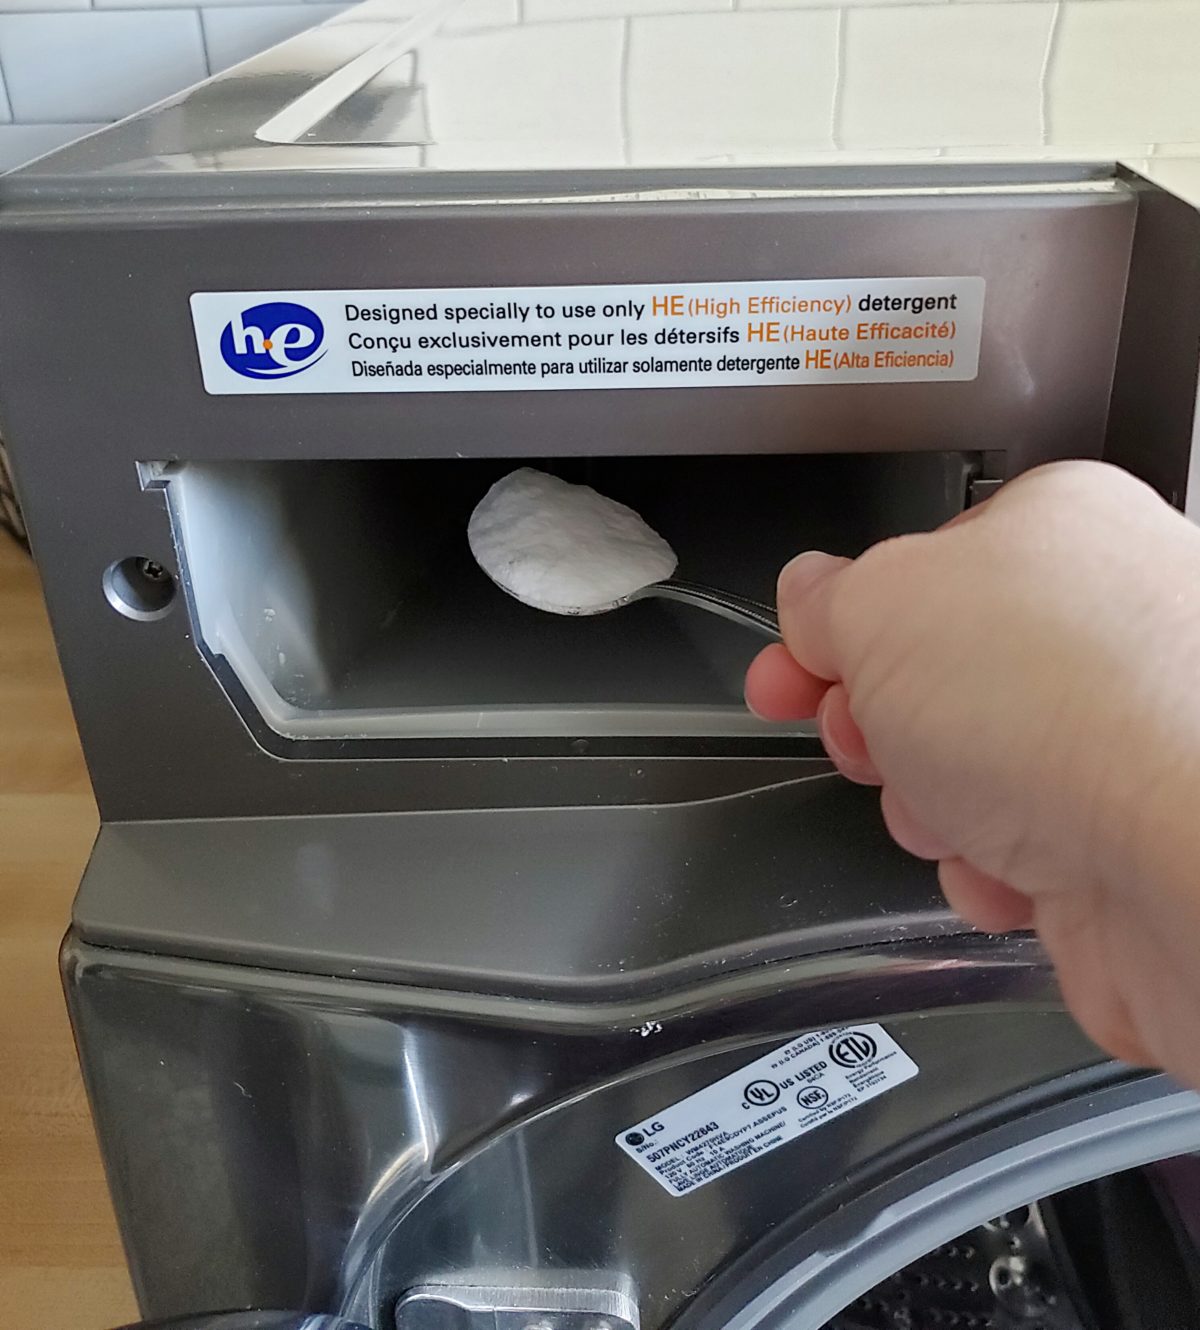
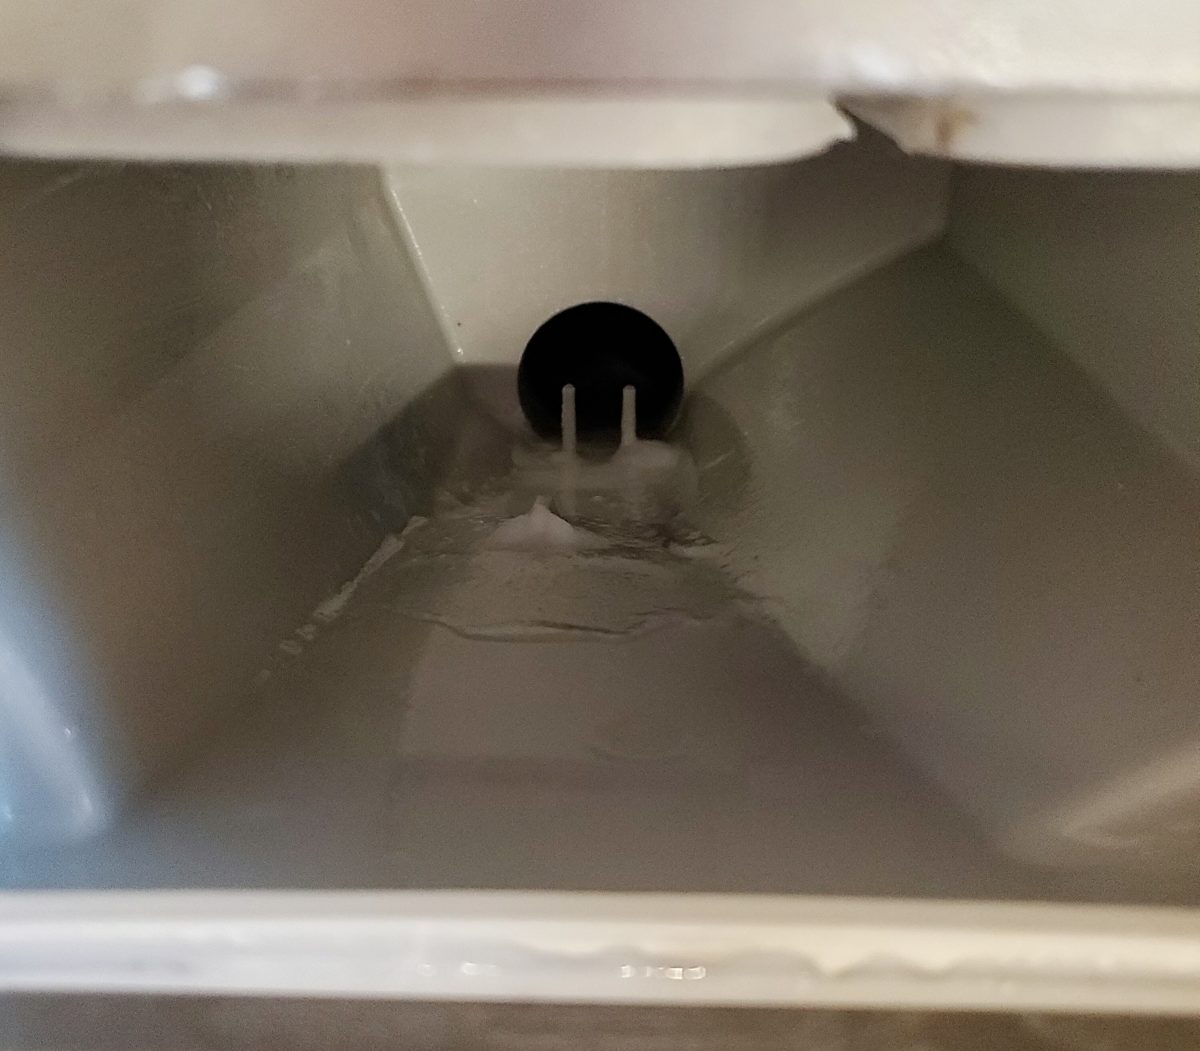
The first thing I did was scrub the inside where the detergent tray goes with the baking soda/ vinegar mixture. Make sure to scrub the top really well too! Then I added two tablespoons of baking soda into the compartment.
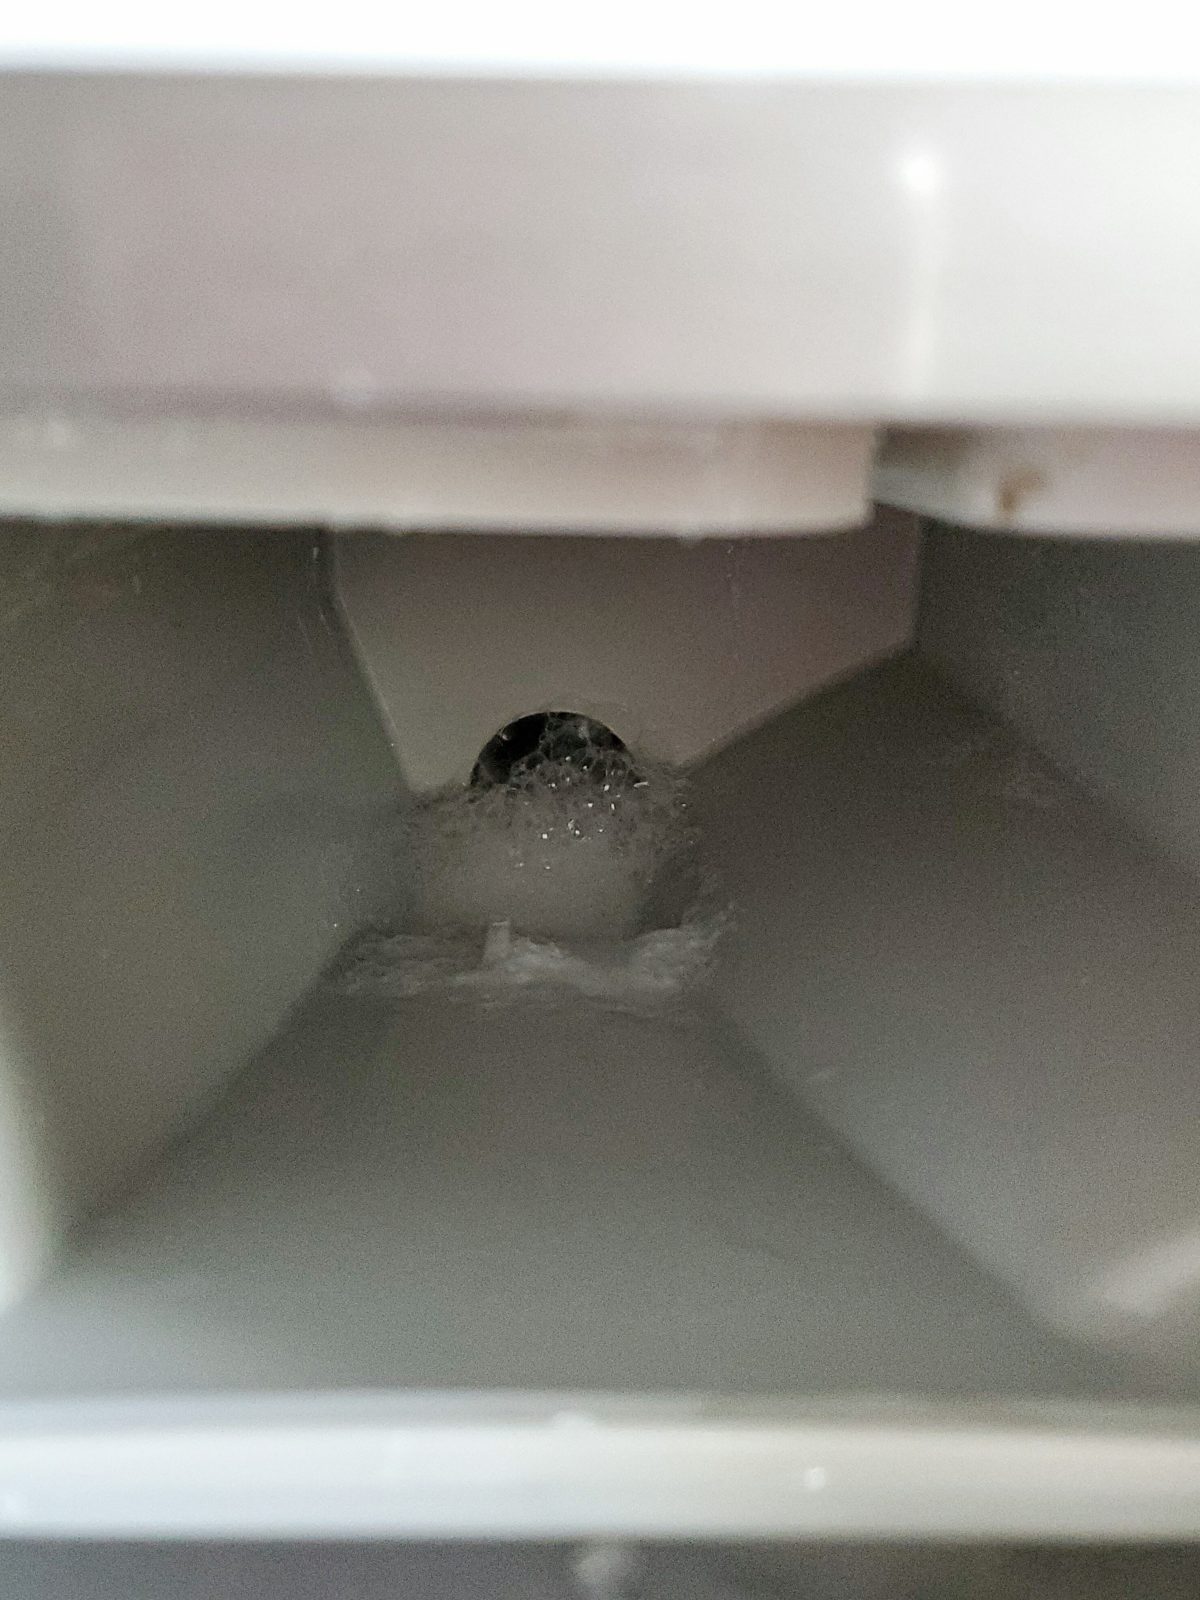
Then I pour about 2-3 tablespoons of vinegar onto the baking soda. There is that cool fizzing reaction again!! This will help clean and deodorize the drain where your detergent, softner and bleach go down.

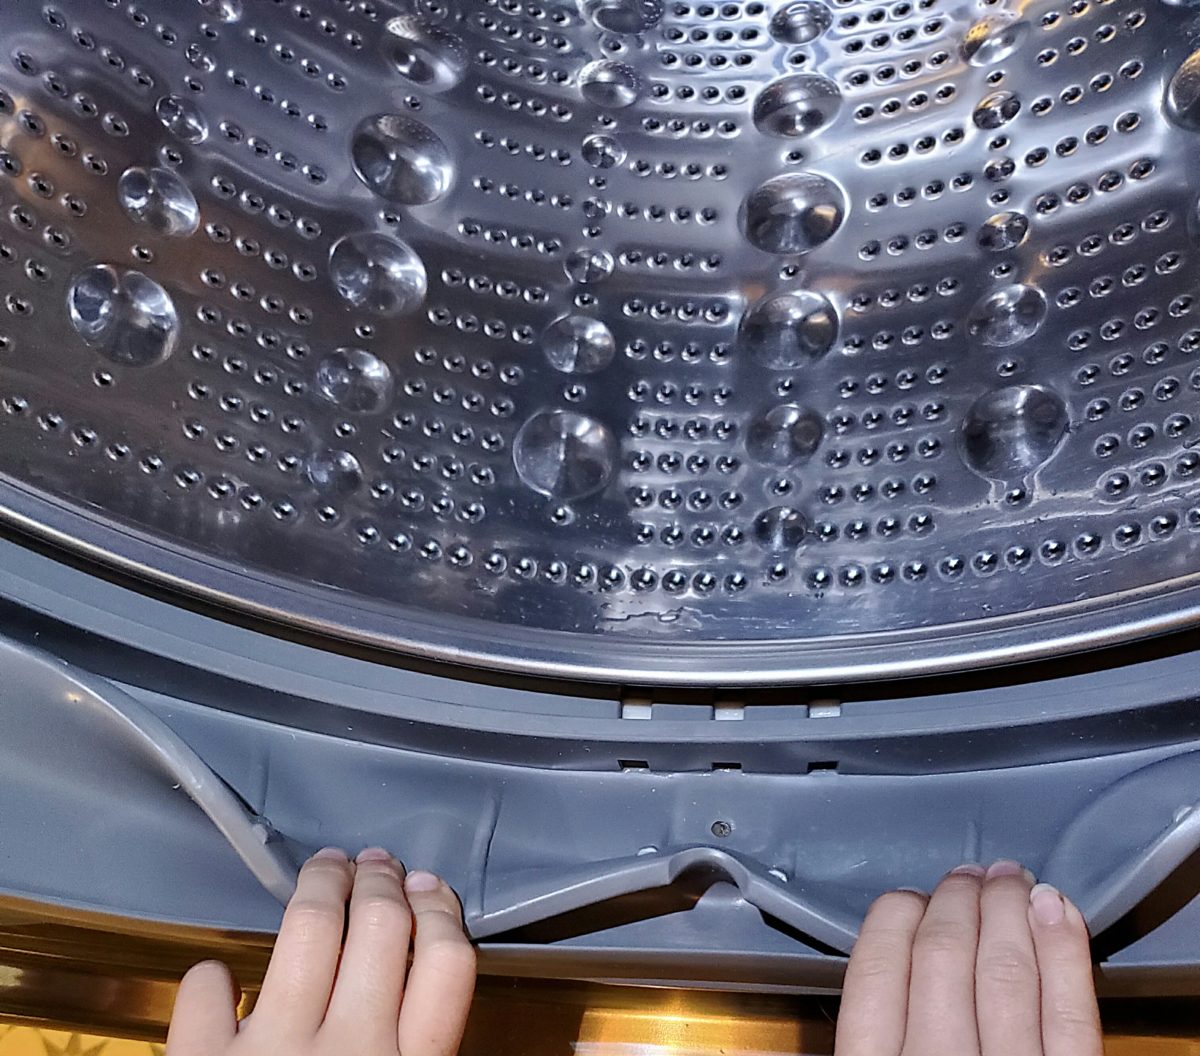
Next I scrubbed down the rubber ring with the baking soda/vinegar mix. I tried to get in the crevices the best I could.
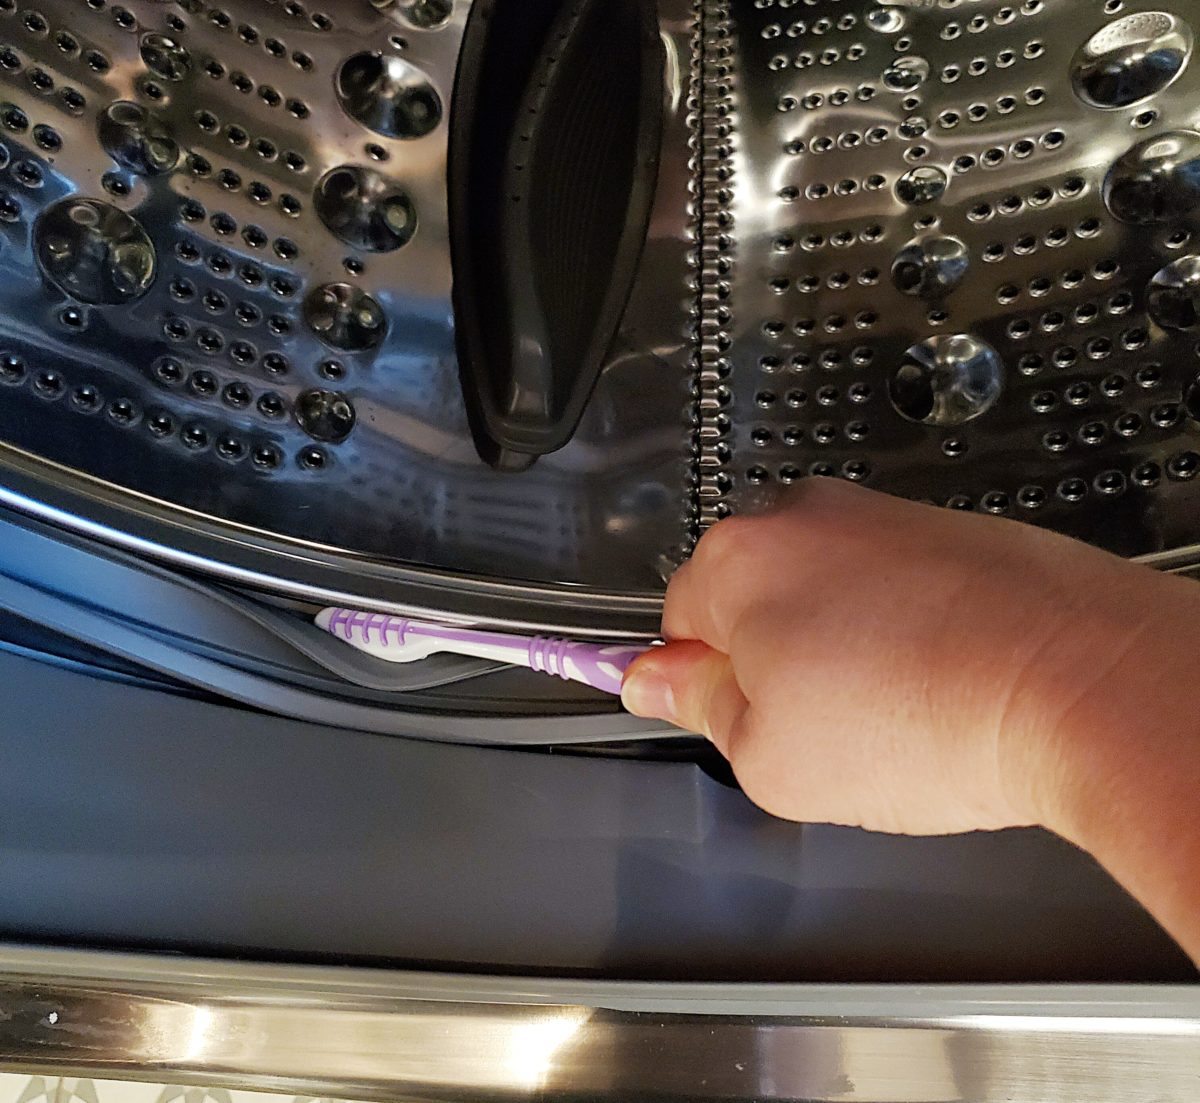
Once I wiped the rubber seal down best I could I pulled back the very front portion and saw more gunk! I tried to get my sponge in there, but it was too big, so I pulled out the best cleaning tool ever invented… a toothbrush!! It fit in there perfectly! It was like it was made for the space!
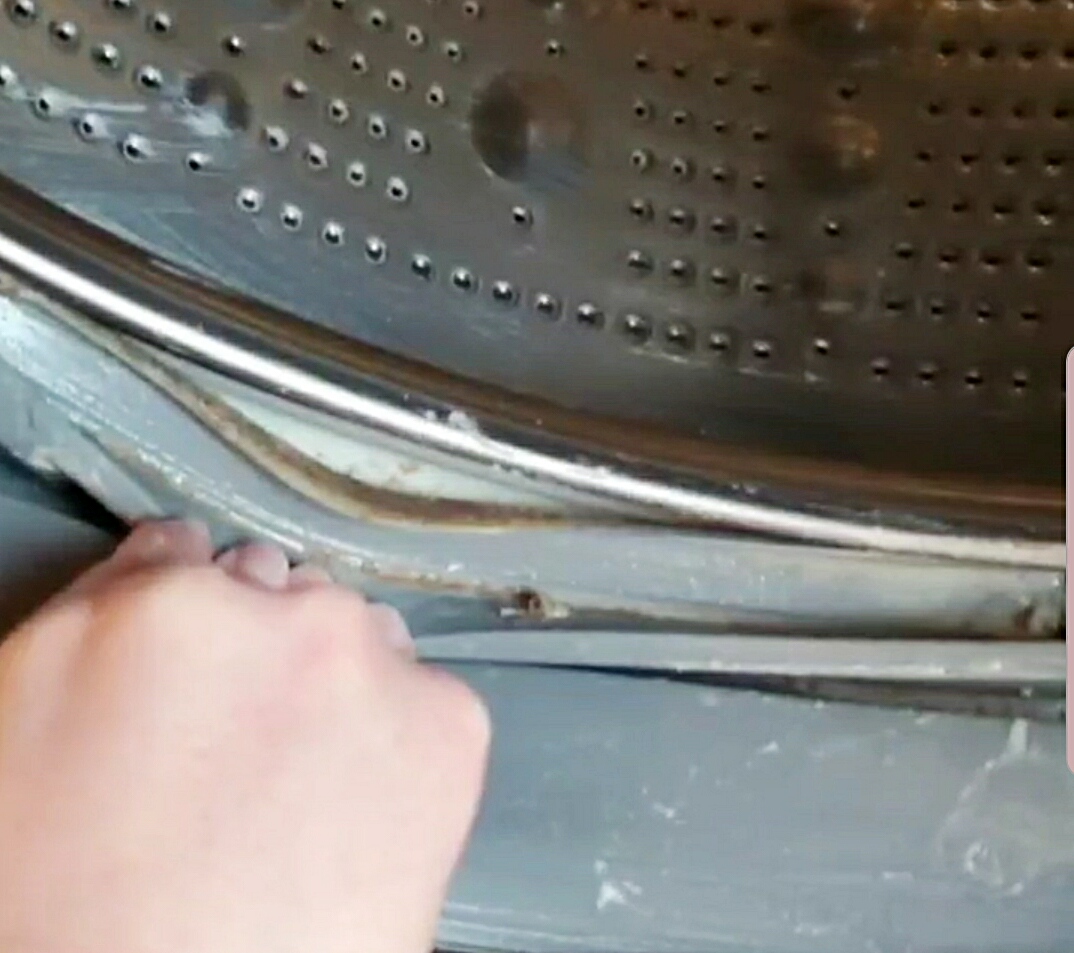
Here is what that area looked like before I hit with my toothbrush and baking soda/vinegar cleaning mixture. Wait till you see the after!
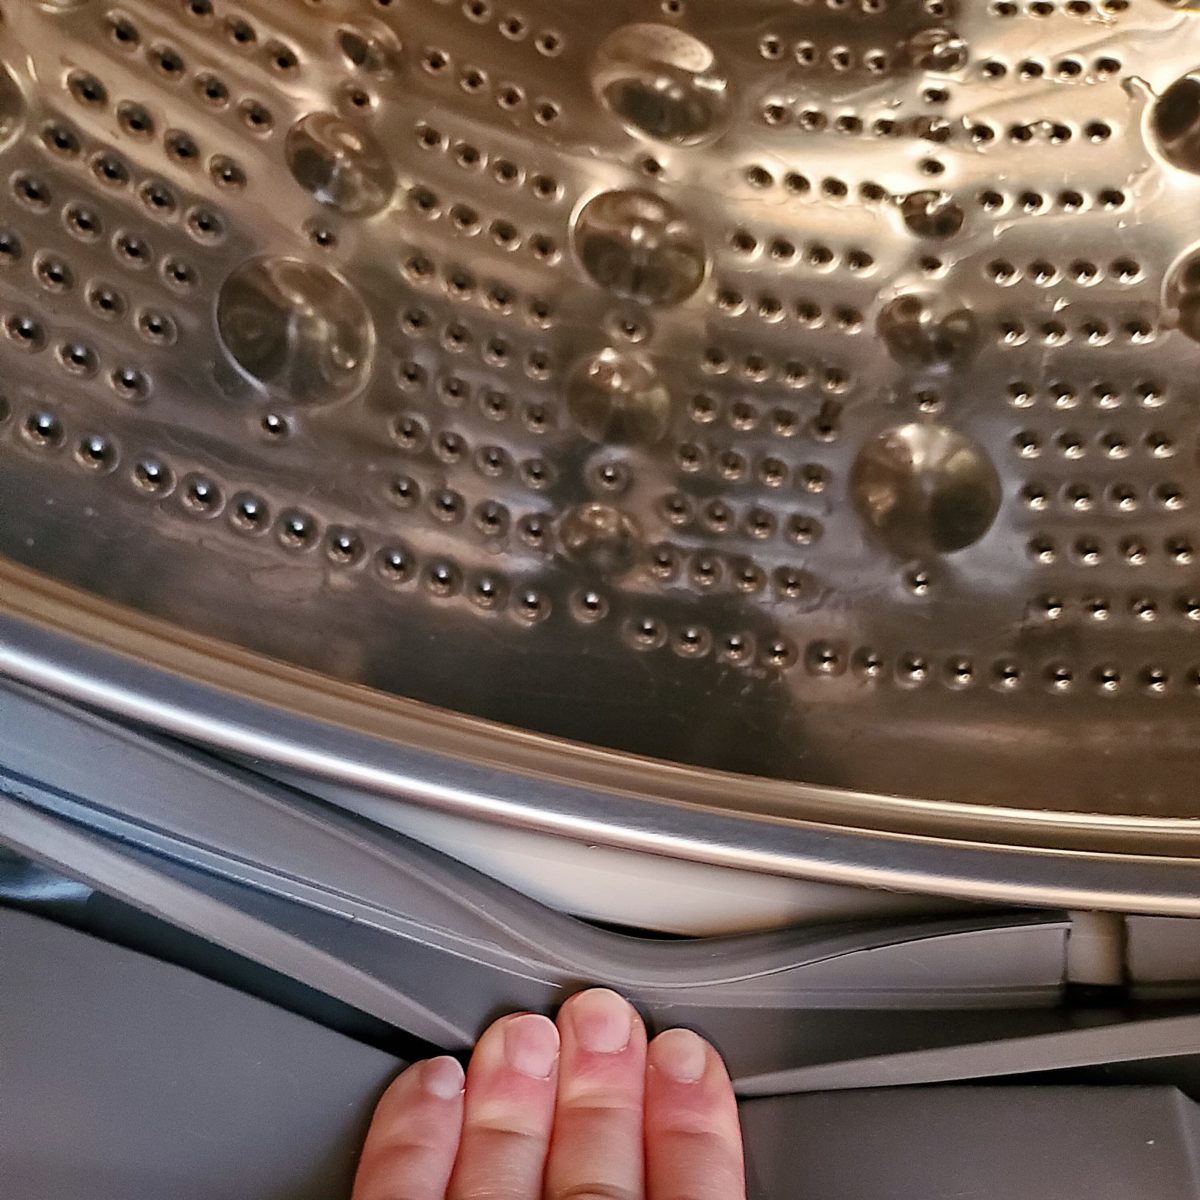
Can you believe thats the same area!!! All the build is gone!
Once I was satisfied with cleaning all the ares of the washer I ran a baking soda and vinegar wash. I put 2 heaping tablespoons of baking soda in where you put detergent and put 2 tablespoons vinegar in the fabric softner slot. I ran the washer on regular wash. Next time I think I will pour the baking soda directly into the drum and pour the vinegar into where the detergent goes. After this wash was done, I then ran a bleach run. I poured 2 tablespoons bleach into the slot where the detergent goes and ran it on a regular wash.
The two washes worked really well, but I was still left with mold stains. There wasn’t any mold left, just the stains where they had been. Luckily one of my instagram friends shared a video with me that showed a lady soaking cotton makeup pads in bleach and placing them inside the rubber seal.

Luckily I had guaze on hand so I used that. I poured a cup full of bleach into a bowl and then placed several cotton gauze pads into the liquid and let them soak for a minute.
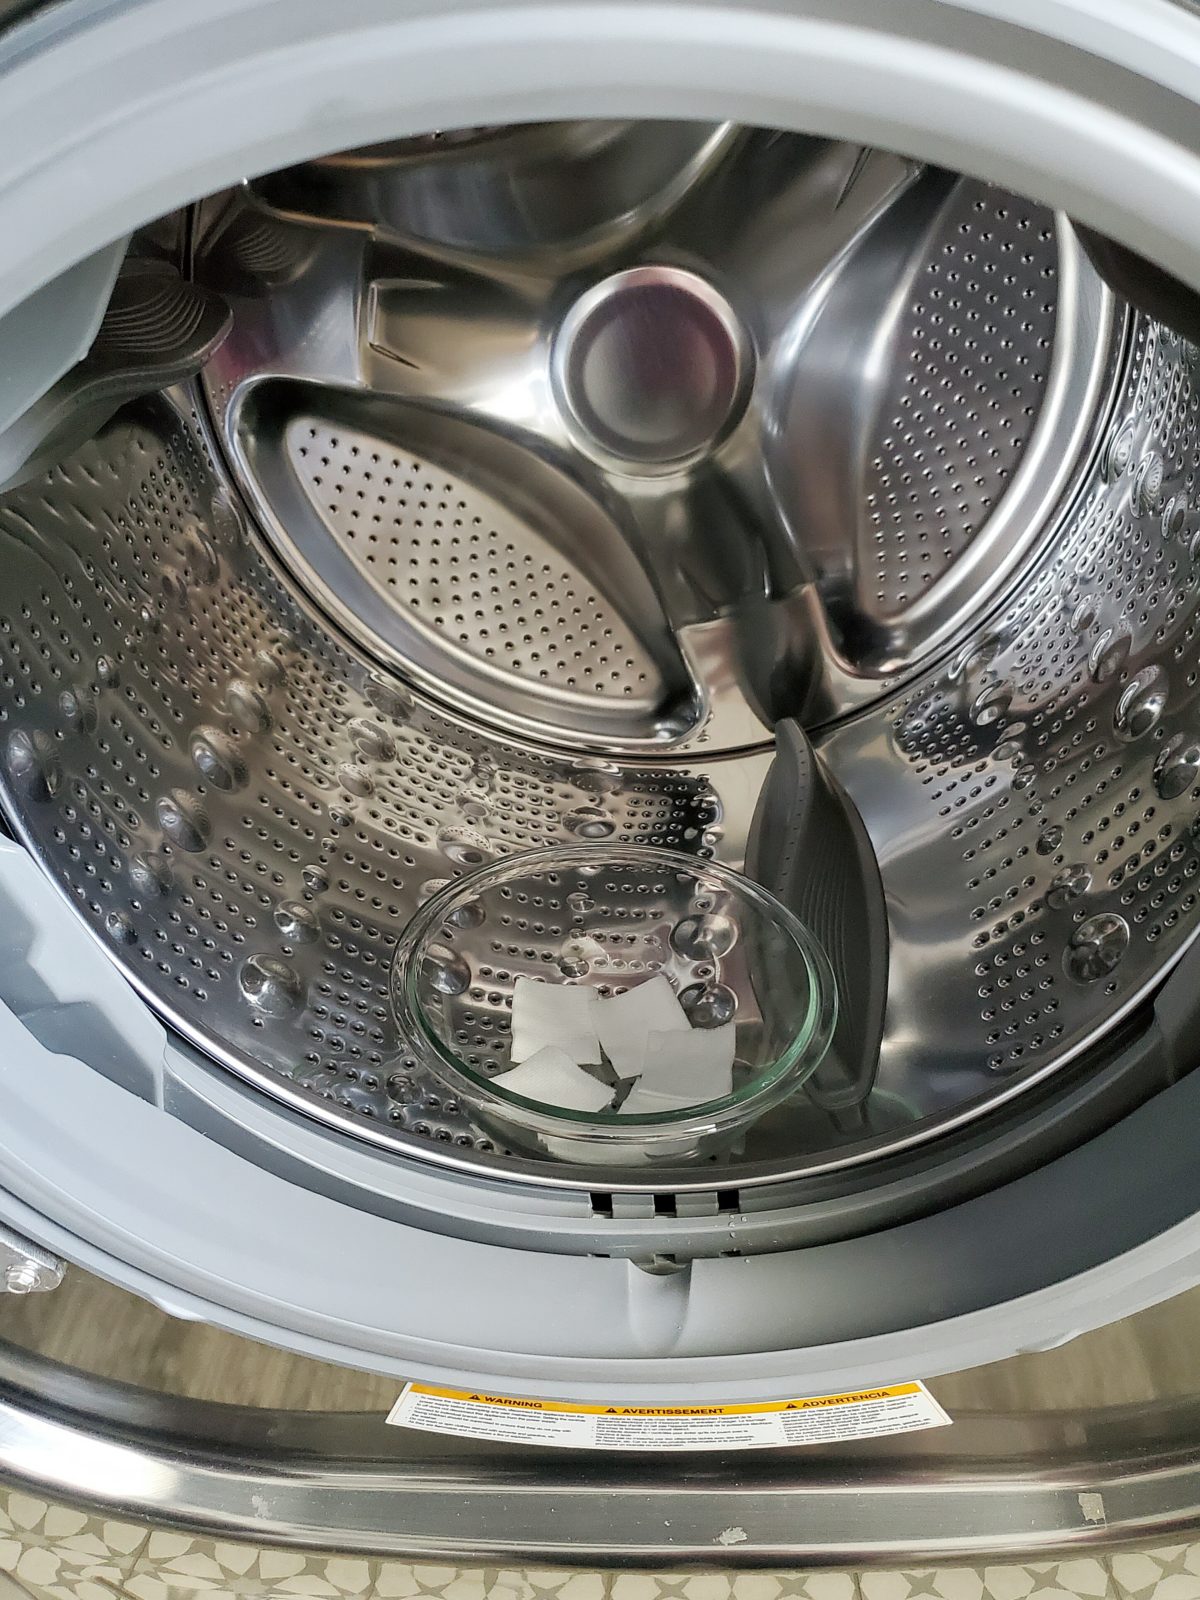
I placed the bowl with the bleach and soaked gauze pads inside the washing drum. That way you reduce the chance of spilling the bleach on yourself or floors! I also placed a towel on the floor and wore gloves. I have a fear of bleach spills! I’ve done it one too many times.
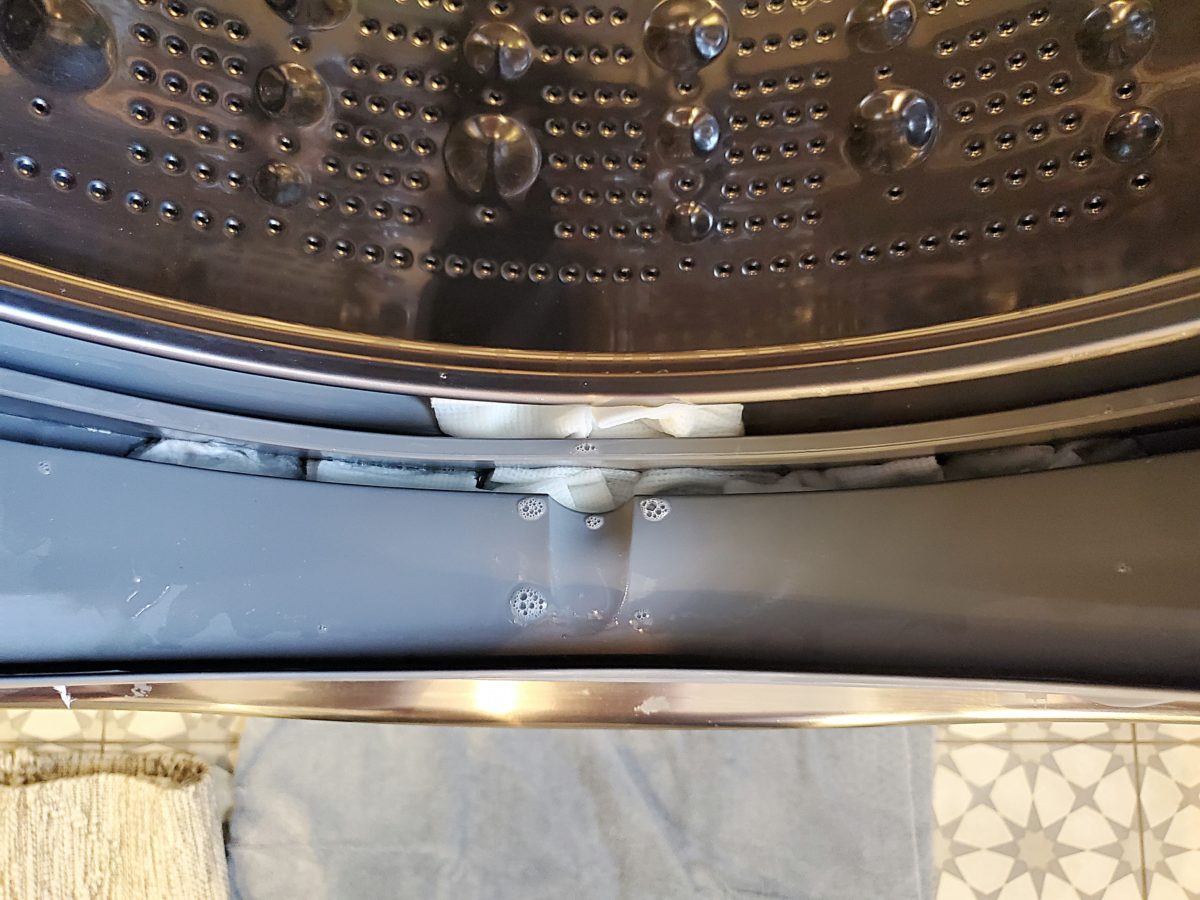
I placed all the bleach soaked gauze pads into the rubber seal where my mold stains where. I did three gauze pads in a row to make sure they were really inside the rubber flap! I left the gauze pads in there for three hours. I’m sure you could do two hours, but I got busy and forgot lol! But since the results were so amazing I’m glad I left them longer!
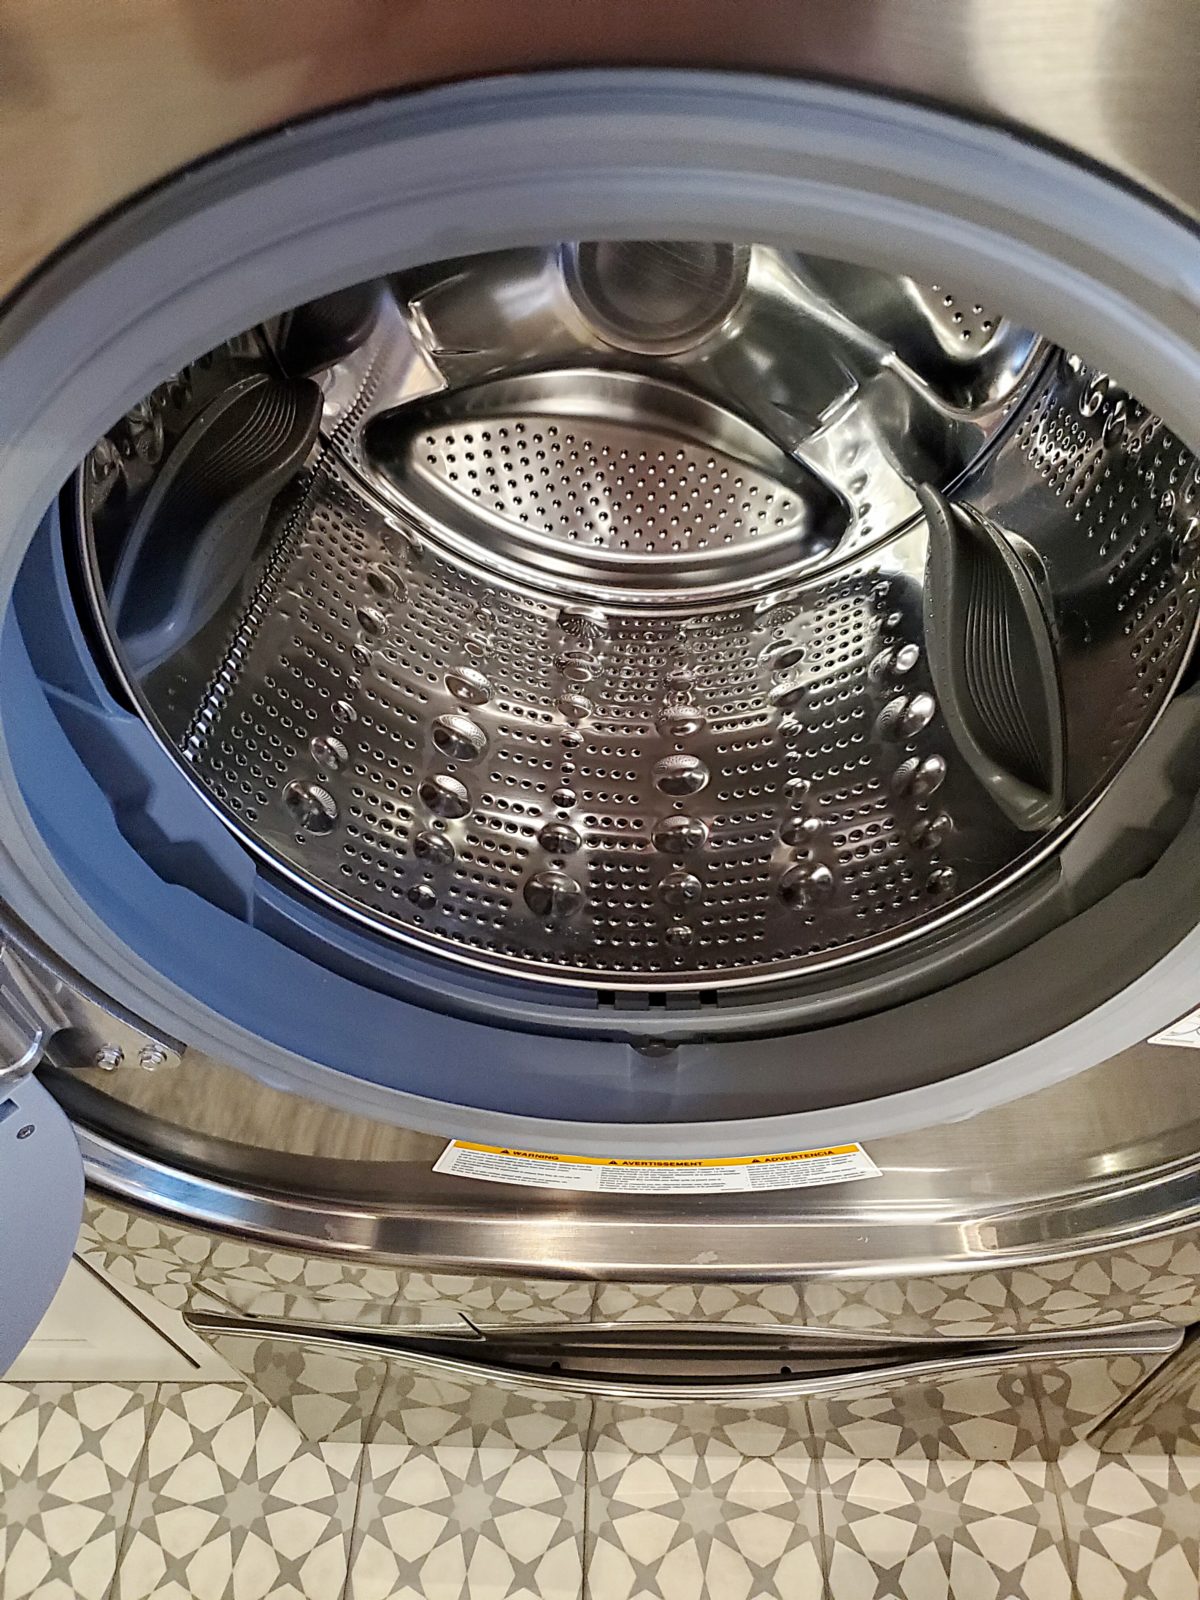
And voila’!!! Can you believe this!!! All the stains are gone!! I was so impressed I literally screamed! It looks like a brand new rubber seal and washer!
Just a little reminder how far we came!! I mean can you even believe these results!
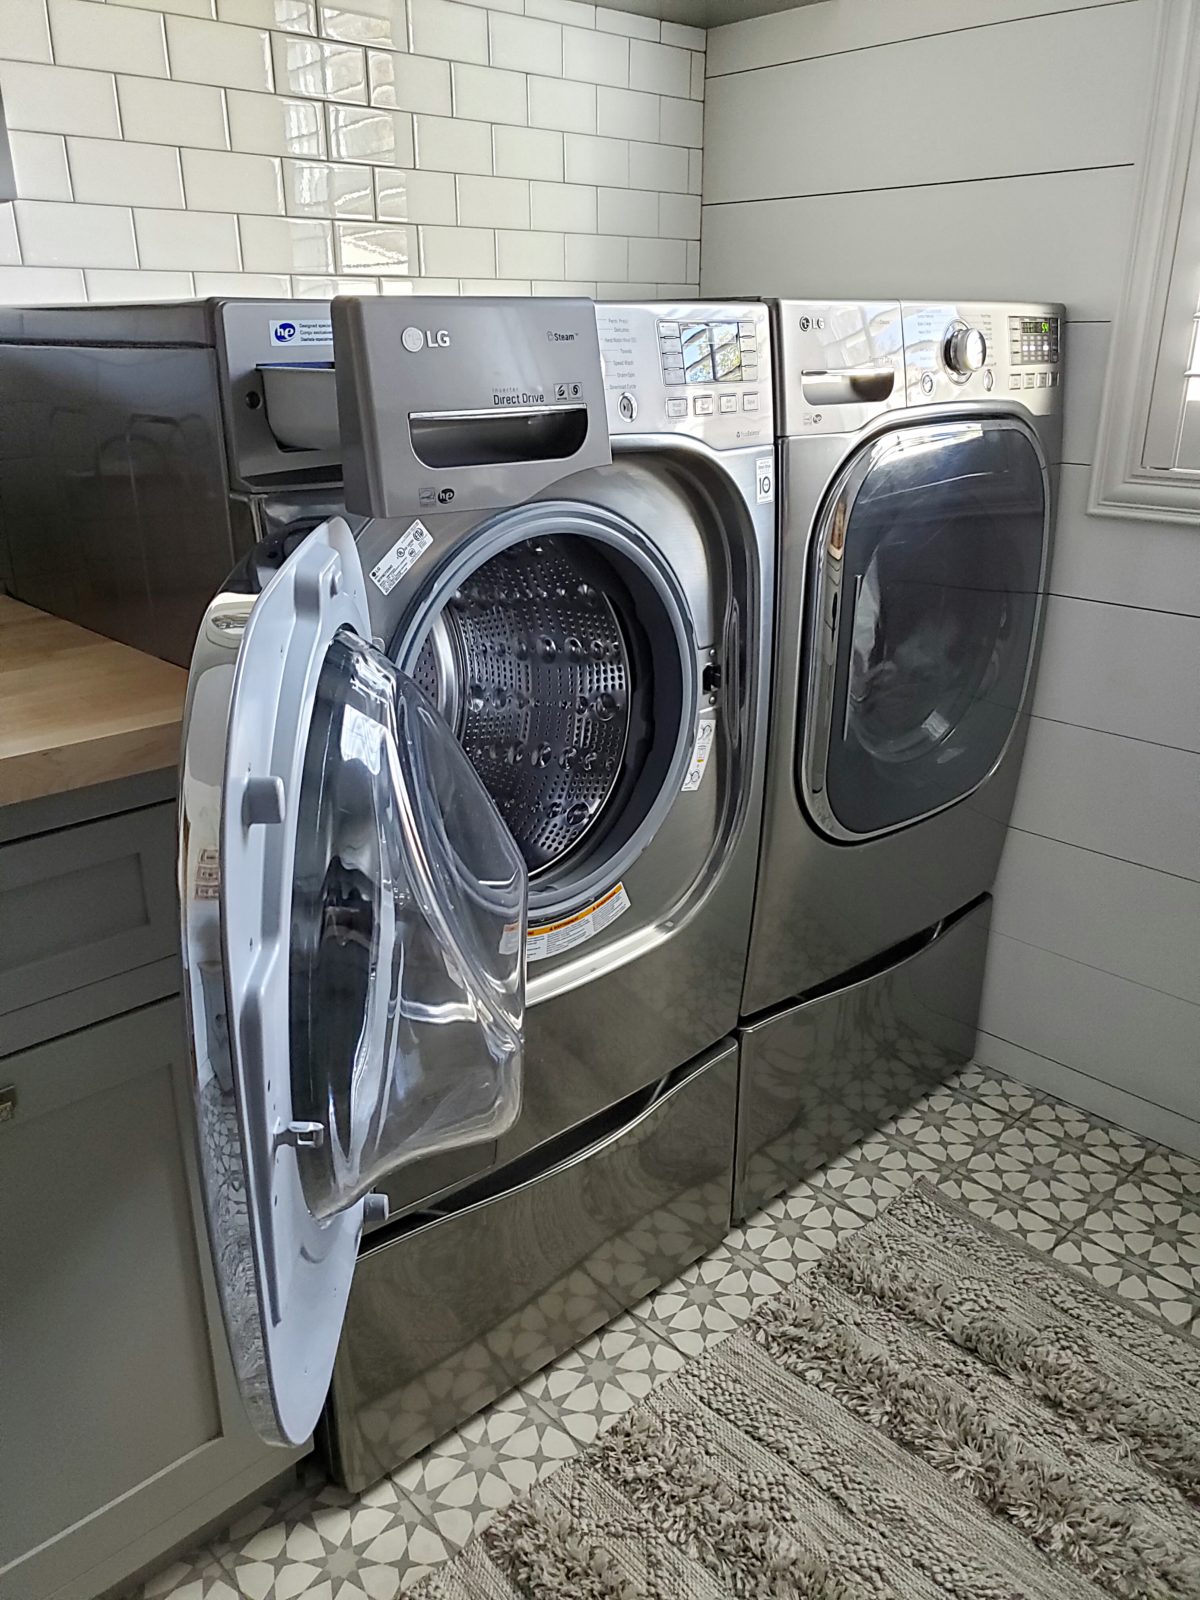
It honestly feels like I have a brand new washing machine! It’s so clean and shiny I really don’t want to use it anymore! Unfortunately my life consists of endless piles of laundry!
In order to keep the mold at bay you need to leave your washing machine door open when not in use and the detergent compartment. Everything needs to be able to dry out. I also have started drying the rubber seal when I am done using the washing machine. Some people said they use Clorox wipes to clean the rubber seal when they are done washing, which I think is a great idea! I have also started adding 2 tablespoons of vinegar with every load. I pour it into the slot where fabric softner would go. My clothes actually seem cleaner and they do not smell like vinegar. I will also run a bleach cycle every month, or use my Affresh Tablet.

As I mentioned I have the LG 4.5 cu. ft. High-Efficiency Front Load Washer with Steam on all LG front loading washing machines there is a square door like you see above. I have been told that the Samsung front load washing machines have this too.
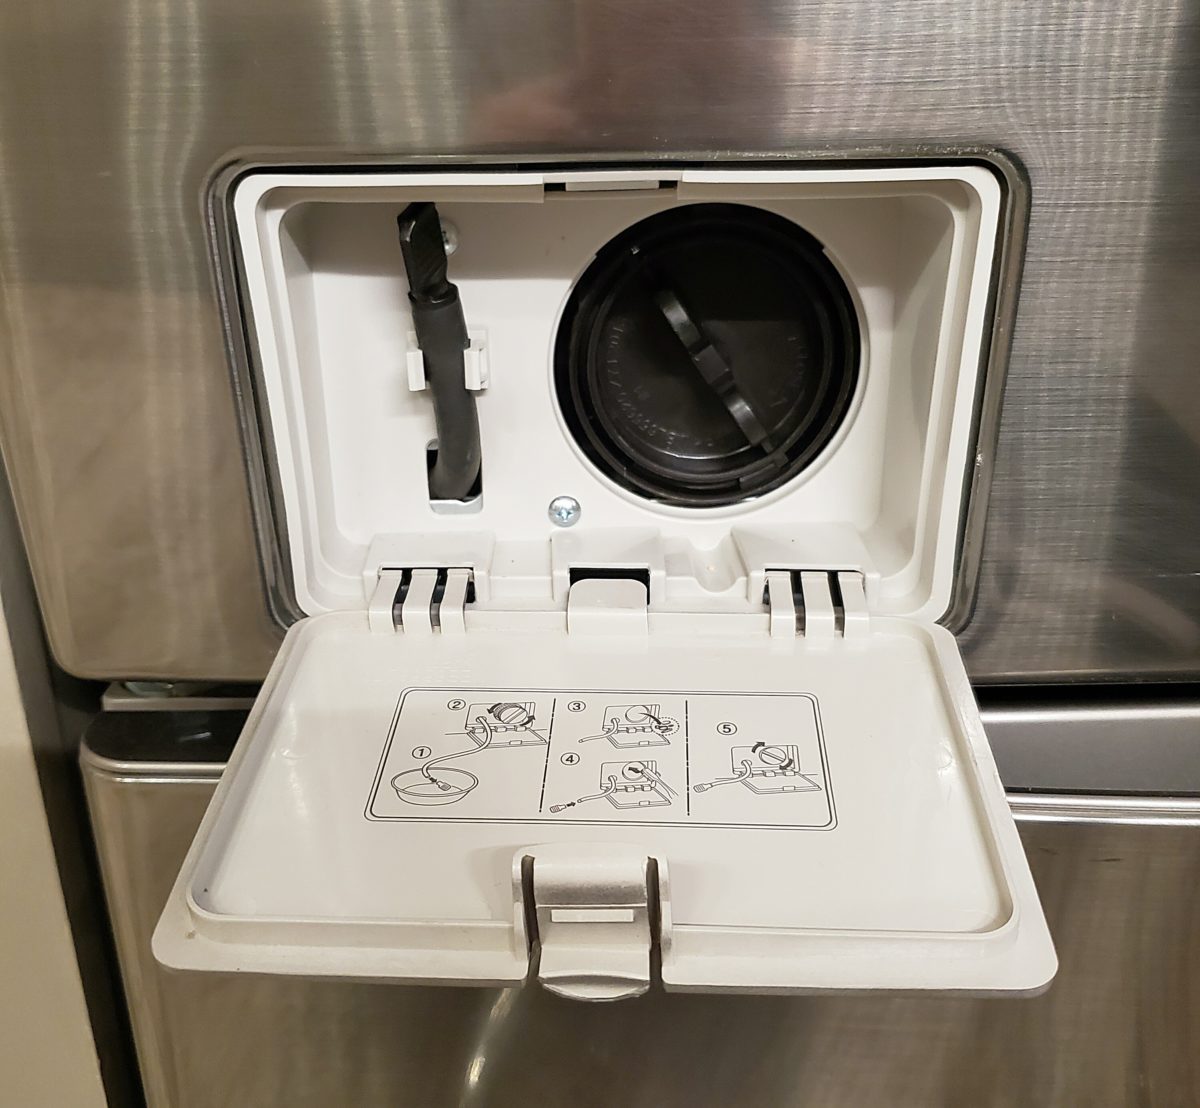
If you open the door you will see a rubber tube and and black circle with a handle. Thankfully I had a great appliance salesman when I purchased my washer and dryer and he informed me that I needed to drain the tube and clean the filter/catch all often.
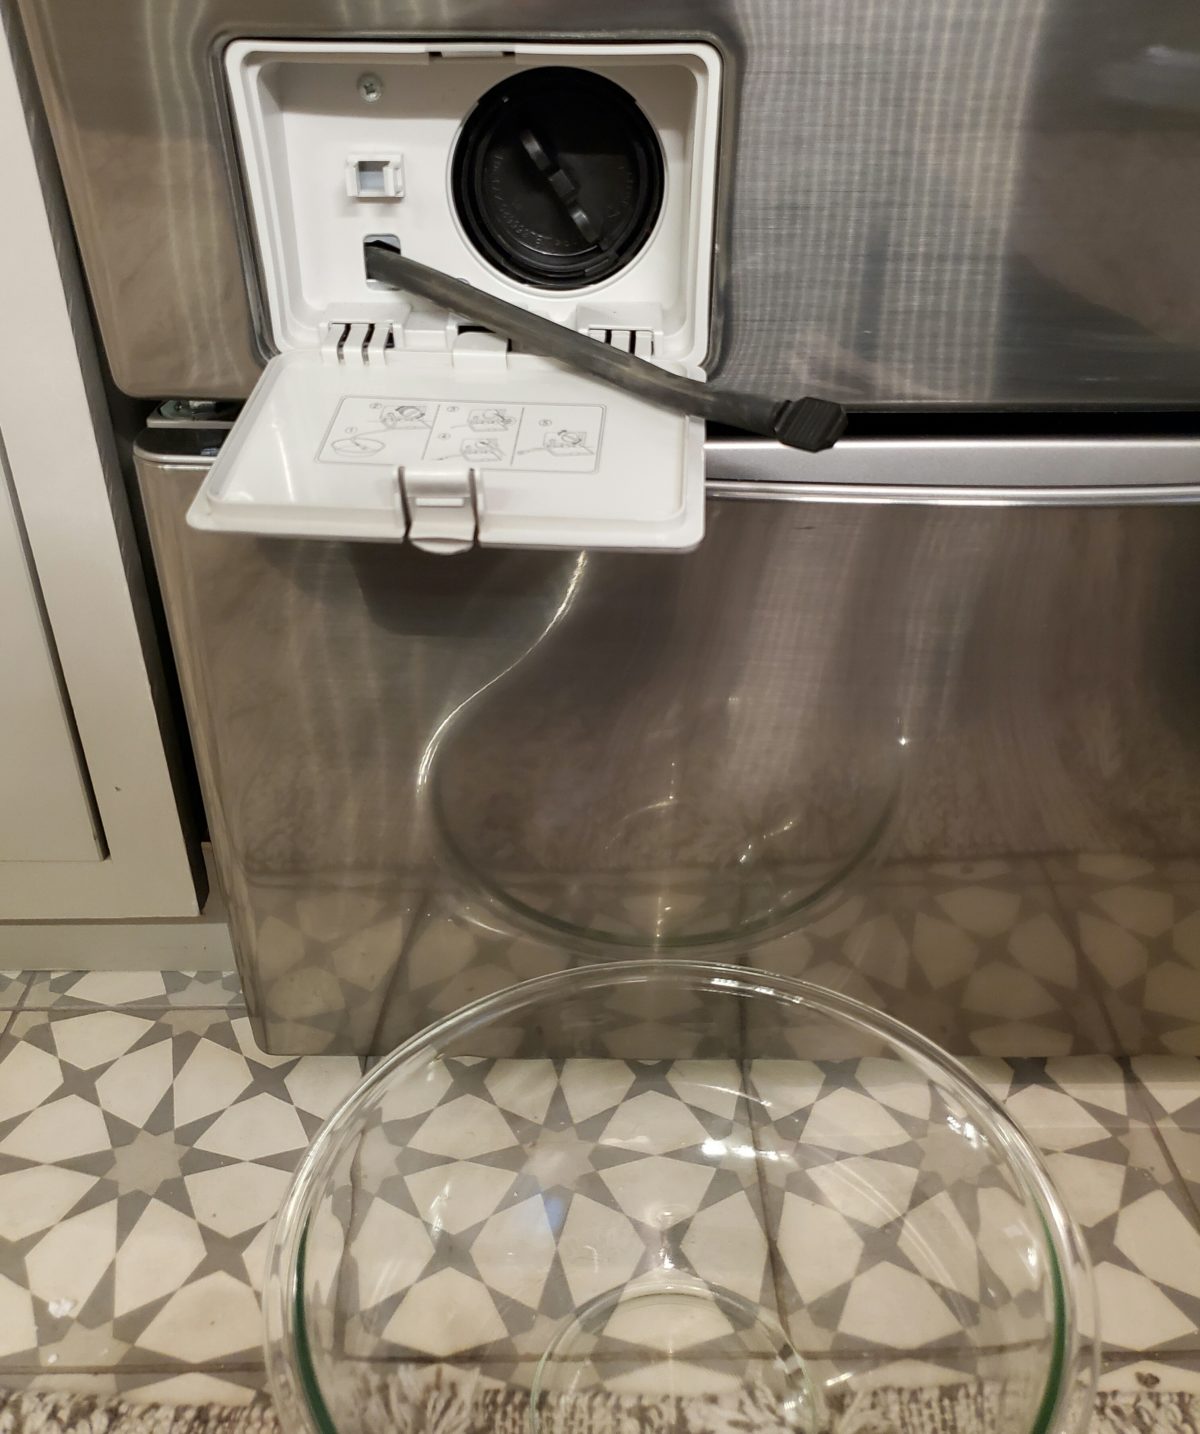
What you need to do is get a bowl for the water to drain into. Then pull out the rubber tube and unscrew the cap. Water will drain out of the tube. If you haven’t done it ever or lately it will be dirty and have an odor. Ideally you should probably drain it after you are finished washing clothes, but let’s get real no one has the time for that! Just try to do it regularly. It will help with the smell. If the water is left in there and not drained regularly it starts to smell.

After you have drained the tube make sure to put the cap back on well and return it to its spot. Then twist the handle on the black circle to open it. Pull out the catch all. Lots of time I have dog and human hair stuck in this!! I’ve also had pebbles in it! I take this to the sink and scrub it clean. I will also wipe the inside where the catch all goes. Once that’s done place it back into its compartment and twist until it’s tight. That’s it! Close the door back up and you’re done! Thank you LG for making our lives just a little harder lol!!!
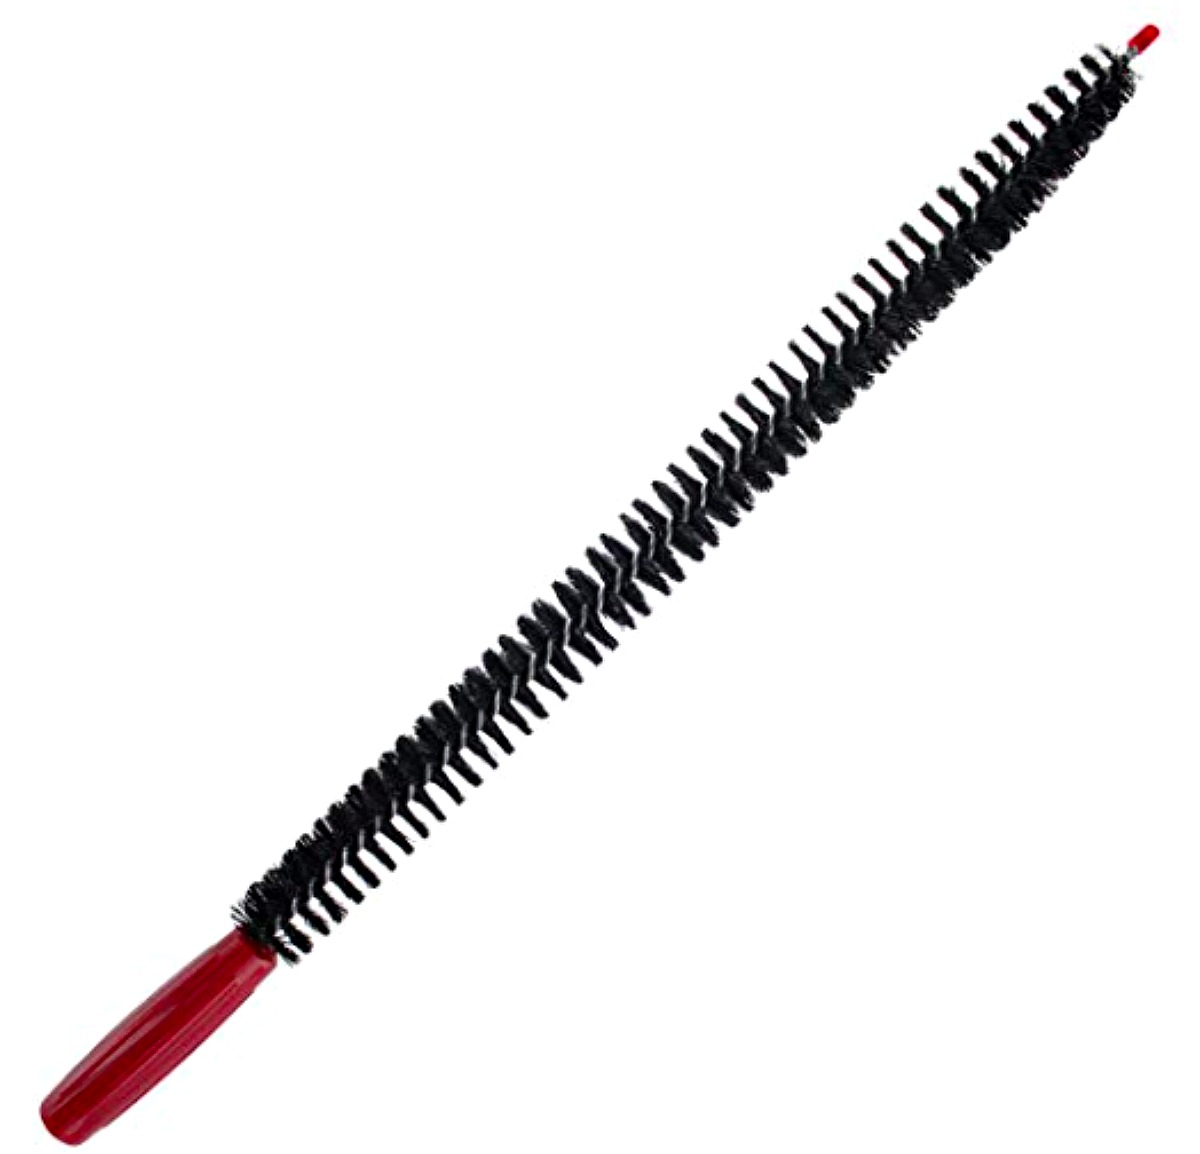
Bonus!! If you do not already have this Dryer Vent Cleaner you need it!! It’s bendable and fits right into your dryer vent. You stick it in and move it all around and pull it out repeatedly. It’s gets al the lint out! This is the only thing that works for me! Just have your vacuum handy because it can get messy!
I hope you found this post helpful and it has motivated you to clean your front load washing machine!! It has been nice not walking into my laundry room and having it smell like rotten eggs!! I am determined to keep up on my maintenance so it never looks like it did again! Thank you for taking the time to read the blog post. Make sure to subscribe so you don’t miss a post!! Happy cleaning!


OMG, Thank you so much for this post!!!
After I watched your Insta story, I had to clean my washer too!!
My washer is only a year old and I even bought afflesh tablets about 6 month ago but never used it…!
Afflesh tablets are awesome! I never thought this tablet makes it so different!
My washer didn’t smell bad in first place because I always kept door open to dry but it still smells and looks so clean and fresh now!
My biggest thank you is to let me know about a little square door at the bottom of washer!!!
I had NO idea this thing exist!!
When I watched your insta story, I thought “wow, LG have that weird thing on the washer? Mine(GE HE front load washer)
don’t even have it(because I never paid attention before.) but when I checked, Mine have it too!!! lol
Mine only have black circle with handle and no tube but wow, so much water came out!!!!!
If I didn’t watch your story, I NEVER knew!!!(I found my manual now and yes, they mentioned about this but who read the manual right?? lol)
Thank you so much!!!!
My washer is spanking clean now and I will do this once a month now!!
Oh this makes me so happy!! thank you so much for your feedback and I’m glad you found this useful!! I am really trying to keep up with regular maintenance and so far no smell!! thank you again for your feedback I really appreciate it.